
Background
All heat pumps operate more efficiently when producing lower-temperature water, so it uses less power to run them for longer, at lower temperature, in order to deliver a given amount of heat. (It’s also better for the longevity of the compressor to have fewer stop-start cycles.) The temperature of the heat pump’s output for a given external temperature can be configured by adjusting the weather compensation ‘Curve’ – which is effectively a simple model for the heat loss characteristics of the house. Houses which are more energy-efficient will tend to want a lower-gradient Curve than those which have higher losses (needing more heat).
I’m kicking myself for not checking this sooner but the NIBE F1145 was installed with the default curve (#9) and an ‘offset’ of -3 (actually I might have changed that previously; not sure) and the house is definitely better-performing than average. The question is, what is the right setting for the curve?
Introduction
The NIBE controller has a good display for the heating curve configuration – while it looks complex at first glance it’s actually pretty straightforward.
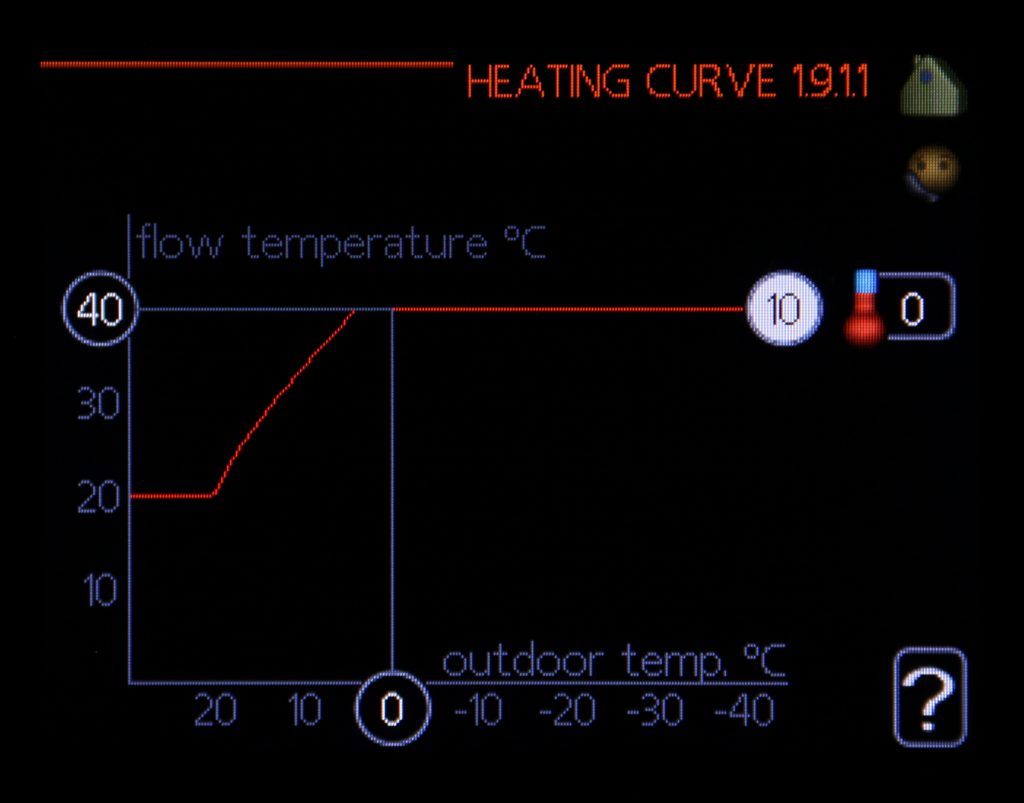
My initial setting looked like this:

In terms of reading the display:
- The title “HEATING CURVE 1.9.11” is just the heading for this section (1.9.11) of the menu hierarchy
- The 9 in the white-filled circle is the currently-selected Curve number
- The white circle merely signifies that this is the item currently active on the display, i.e. pressing the OK button will enable the selection of a different Curve
- The -3 next to the Thermometer icon is the ‘Offset’ applied to the curve
- The circled 0 on the X-axis is the selected X-axis value for the readout, showing that the target flow temperature at an outdoor temperature of 0 degrees is 36 degrees
- The 0 can be changed to show values for other outdoor temperatures, for the currently-selected Curve
For comparison, Curve 9 with an Offset of 0 looks like this:

Comparing the two graphs shows that changing the value of the Offset has the effect of sliding the Curve horizontally without changing the gradient of the Curve. Looks like the -3 means that it needs to be 3 degrees colder outside before the Curve kicks-in.
Note that the Minimum and Maximum flow temperatures (20 and 40) are set elsewhere in the menu hierarchy.
There’s also the complication of the extent to which the indoor temperature has an influence on the heating behaviour.
New Setting – September 2021
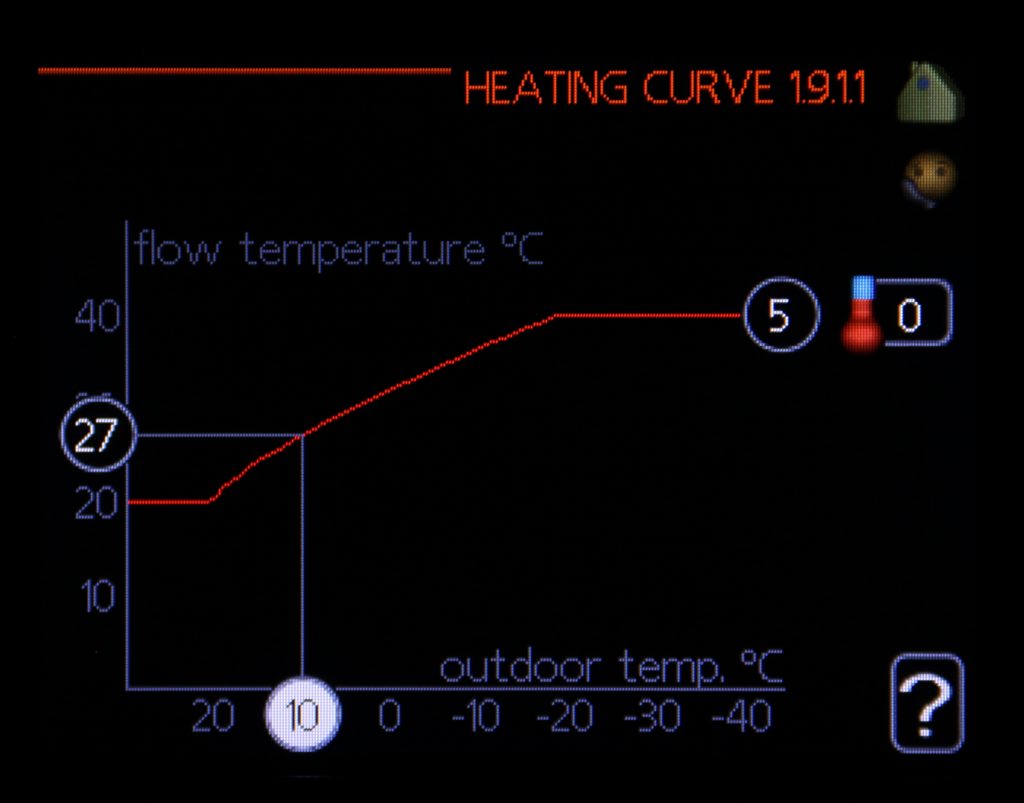
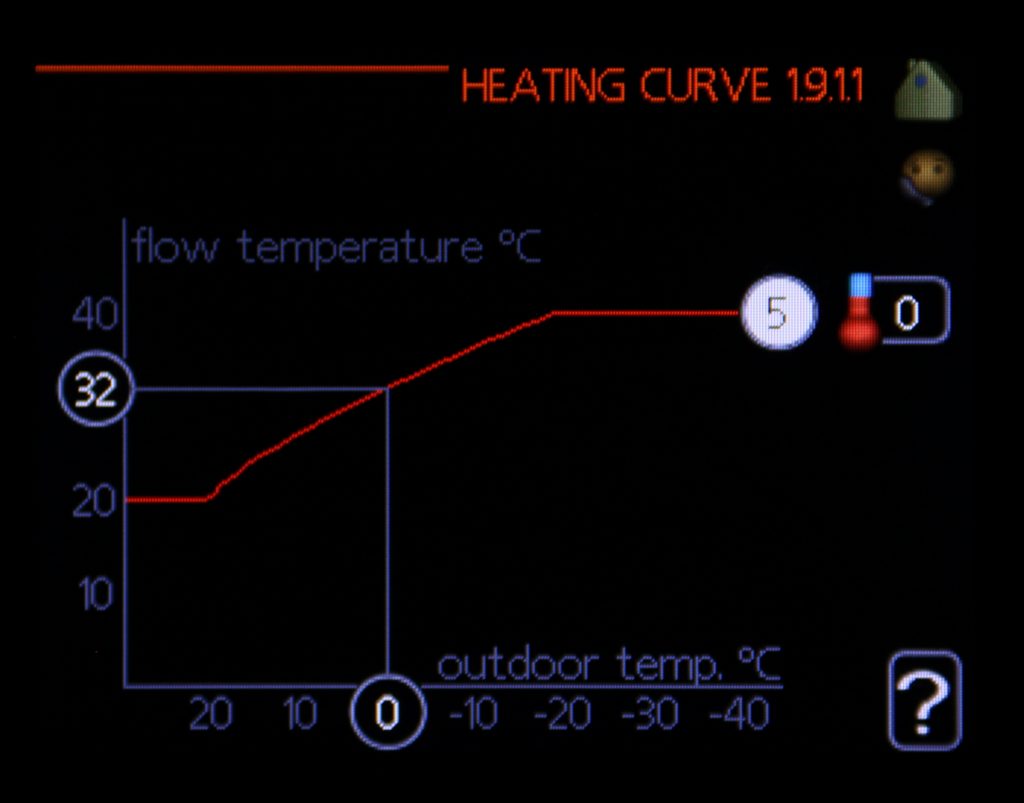
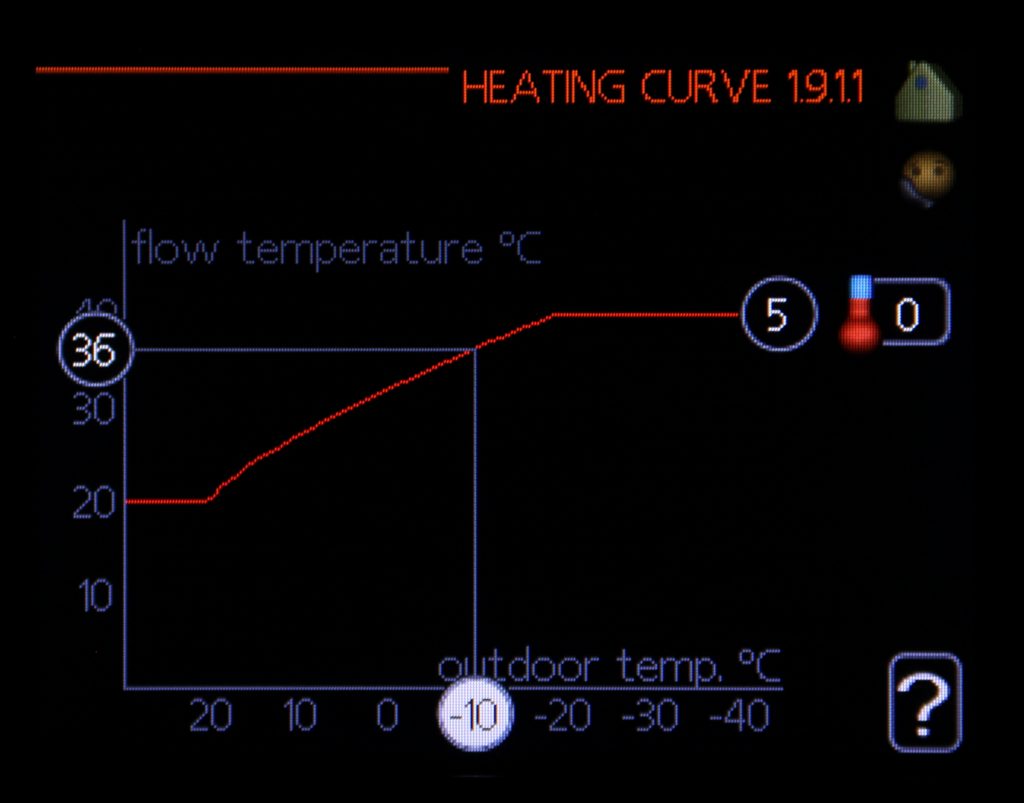
For now (September 1st, 2021), I’m going to swap to Curve 5 with an Offset of 0 and see what happens when the weather gets colder and the house starts to want some heating. Below are three screenshots showing the target flow temperatures for Curve 5 at +10, 0 and -10 degrees outside (27, 32 and 36 degrees respectively).
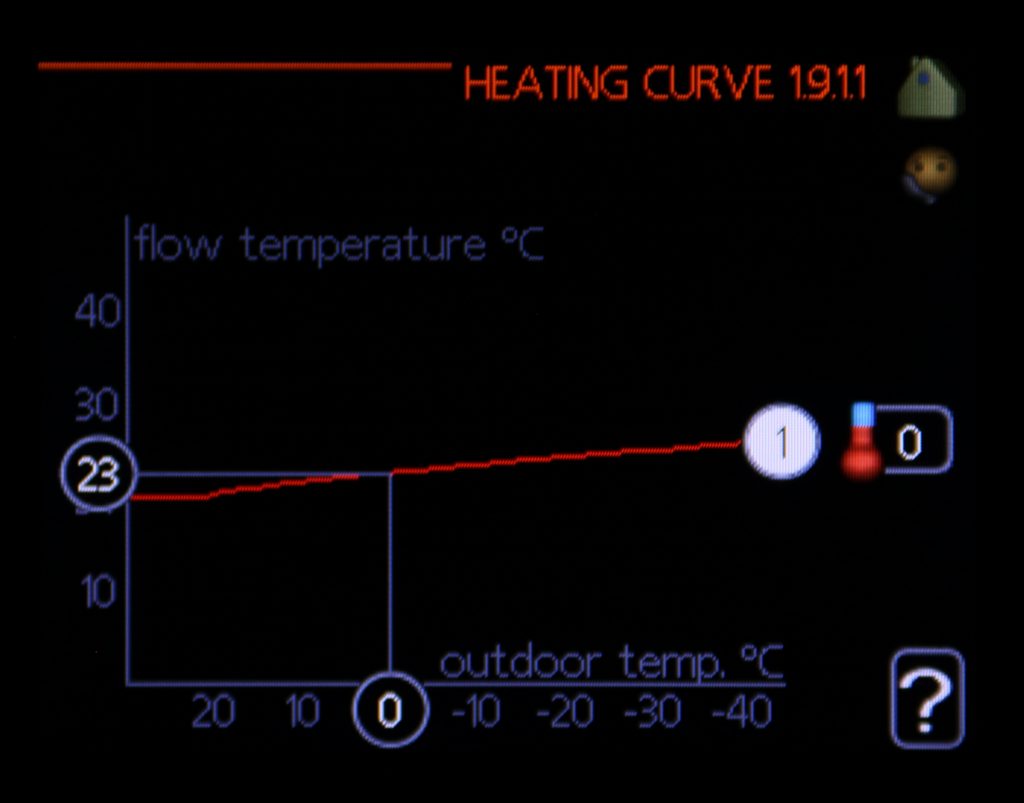
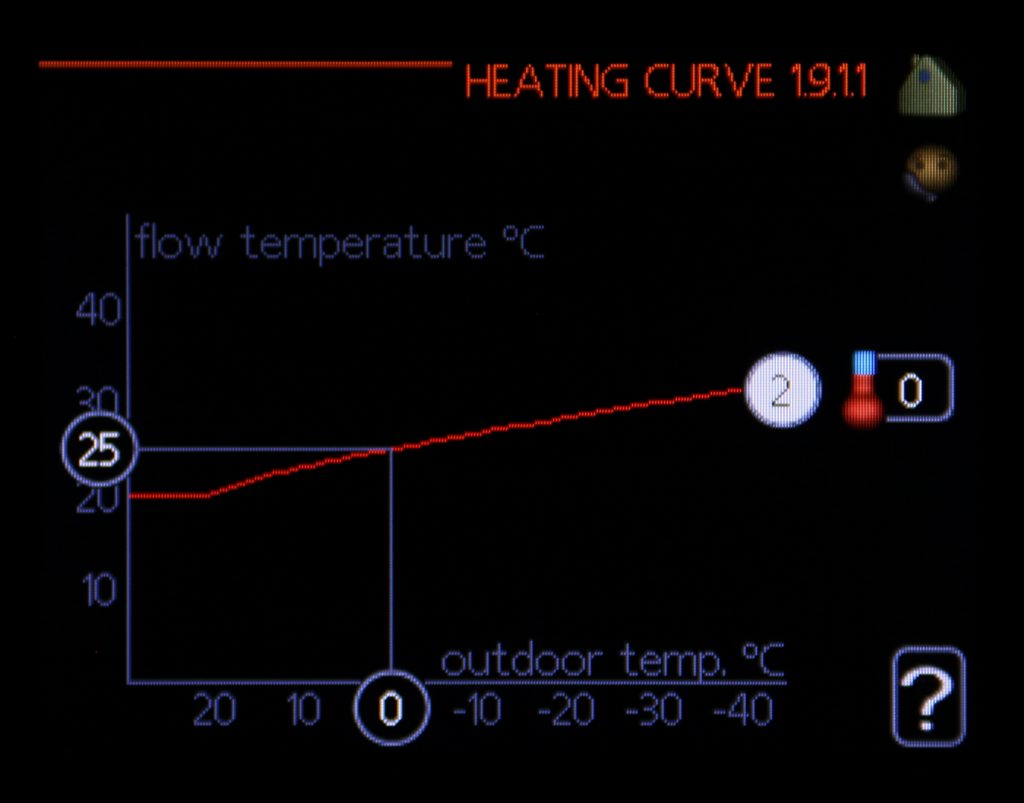
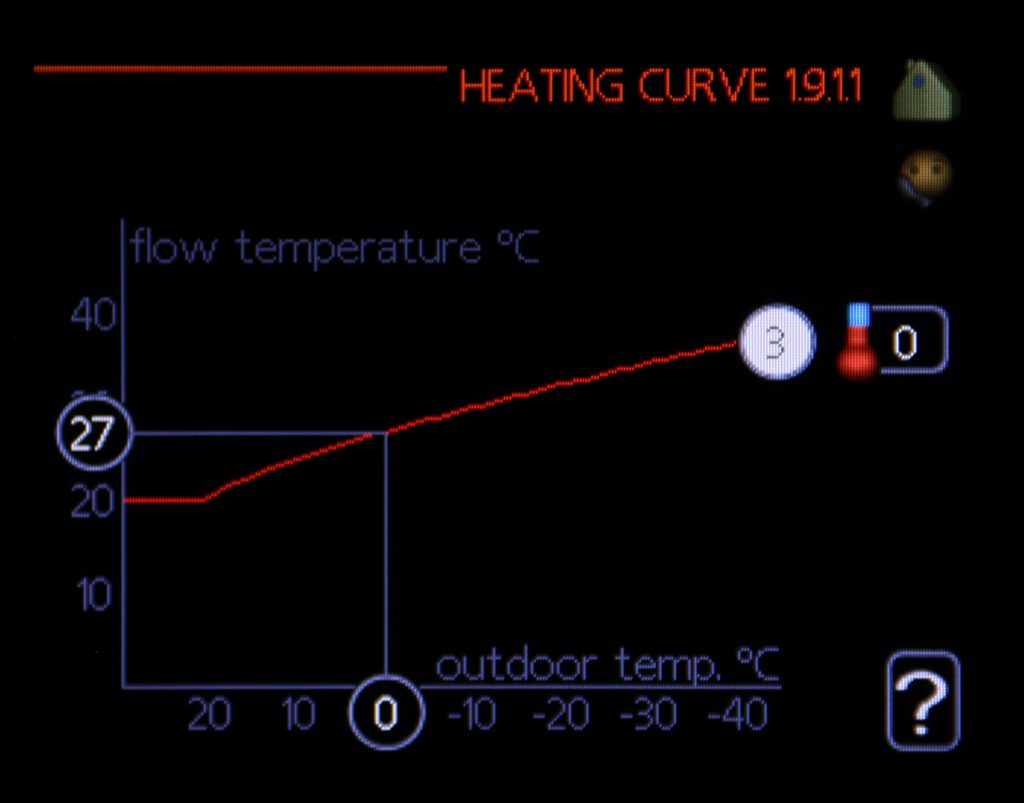
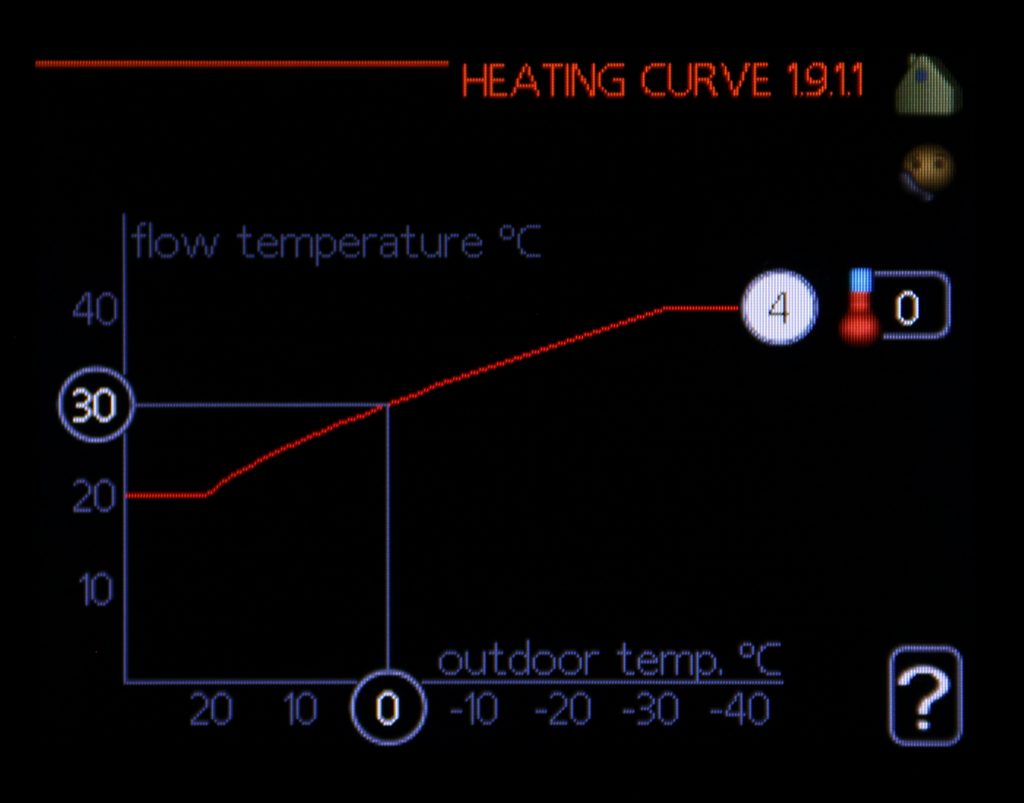
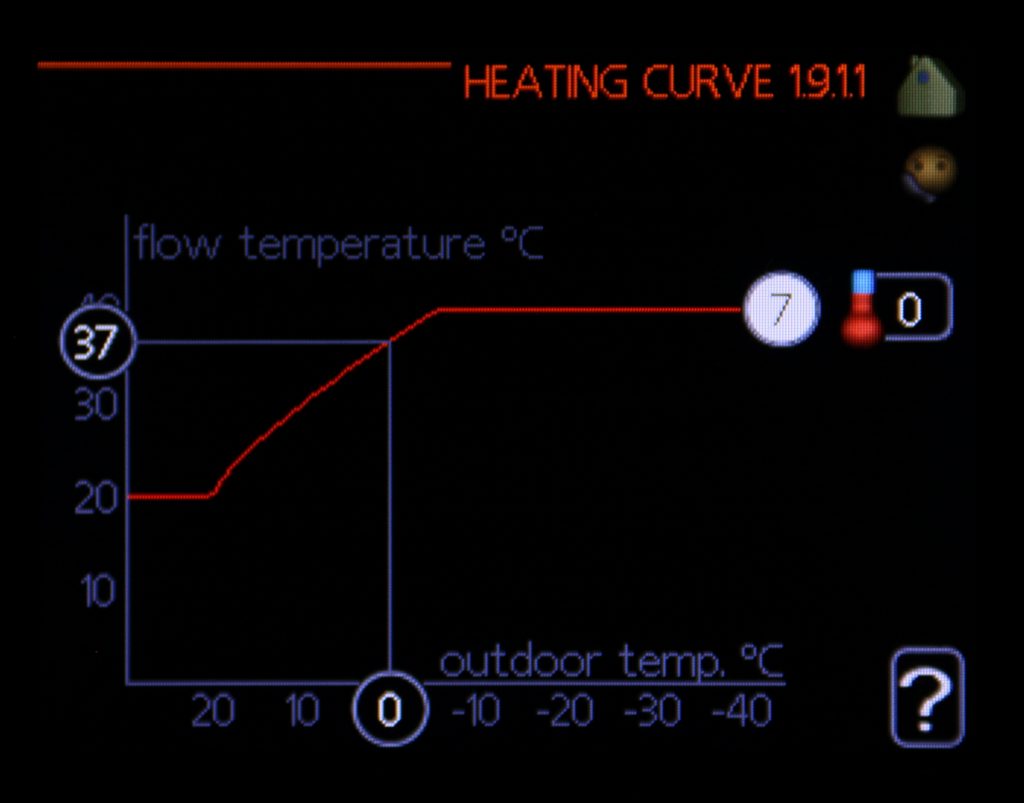
Other Curves for Comparison
Not sure whether the following images are any use to anyone but I took the photos so I might as well post them here.


![]() NIBE Heat Pump Curve Configuration by Marsh Flatts Farm Self Build Diary is licensed under a Creative Commons Attribution-ShareAlike 4.0 International License.
NIBE Heat Pump Curve Configuration by Marsh Flatts Farm Self Build Diary is licensed under a Creative Commons Attribution-ShareAlike 4.0 International License.