
Introduction
I’m using a Ubiquiti Networks UniFi Video Camera as a means of capturing still-frame JPEG images on a regular basis and stitching those together into a video file. As of mid January 2015 the camera is £123 from linitx.com who are probably the best people to buy Ubiquiti gear from in the UK.
Mounting and Weather Protection
The camera is relatively small in size (roughly 75mm diameter and 225mm long, including the mounting bracket) and is suitable for wall- or pole-mounting as shown in these photos from the ubnt.com website: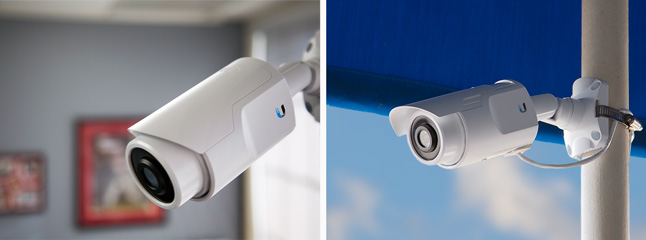
A single Ethernet cable connects the camera to a network and also supplies power via a Power-over-Ethernet injector (a somewhat non-standard 24V rather than IEEE 802.1af 48V) and a pleasingly low maximum power consumption of 4W. I was initially concerned about the voltage drop over roughly 50m of CAT5E cable but it seems the camera is happy with anything between 12 and 24V.
The camera is supplied with a worm-drive hose clamp suitable for fixing to a mounting pole up to about 75mm diameter. Mounting the camera was therefore easy although fashioning an enclosure to give it some protection from the weather (since it’s intended to be used “under an overhang”) was less straightforward. I settled on using a length of 110mm underground drain pipe, with large holes drilled to accommodate the pole passing through and mechanical support from a length of M6 stainless steel screwed rod attached with nuts and washers. That all sounds easy enough but deciding where to drill the holes to match the camera’s mounting angle of 13 degrees was a little tricky – how I miss having a proper workshop! The pipe isn’t exactly watertight (you can see there’s about 2mm clearance around the pole) but any rain that gets inside should drain out easily enough.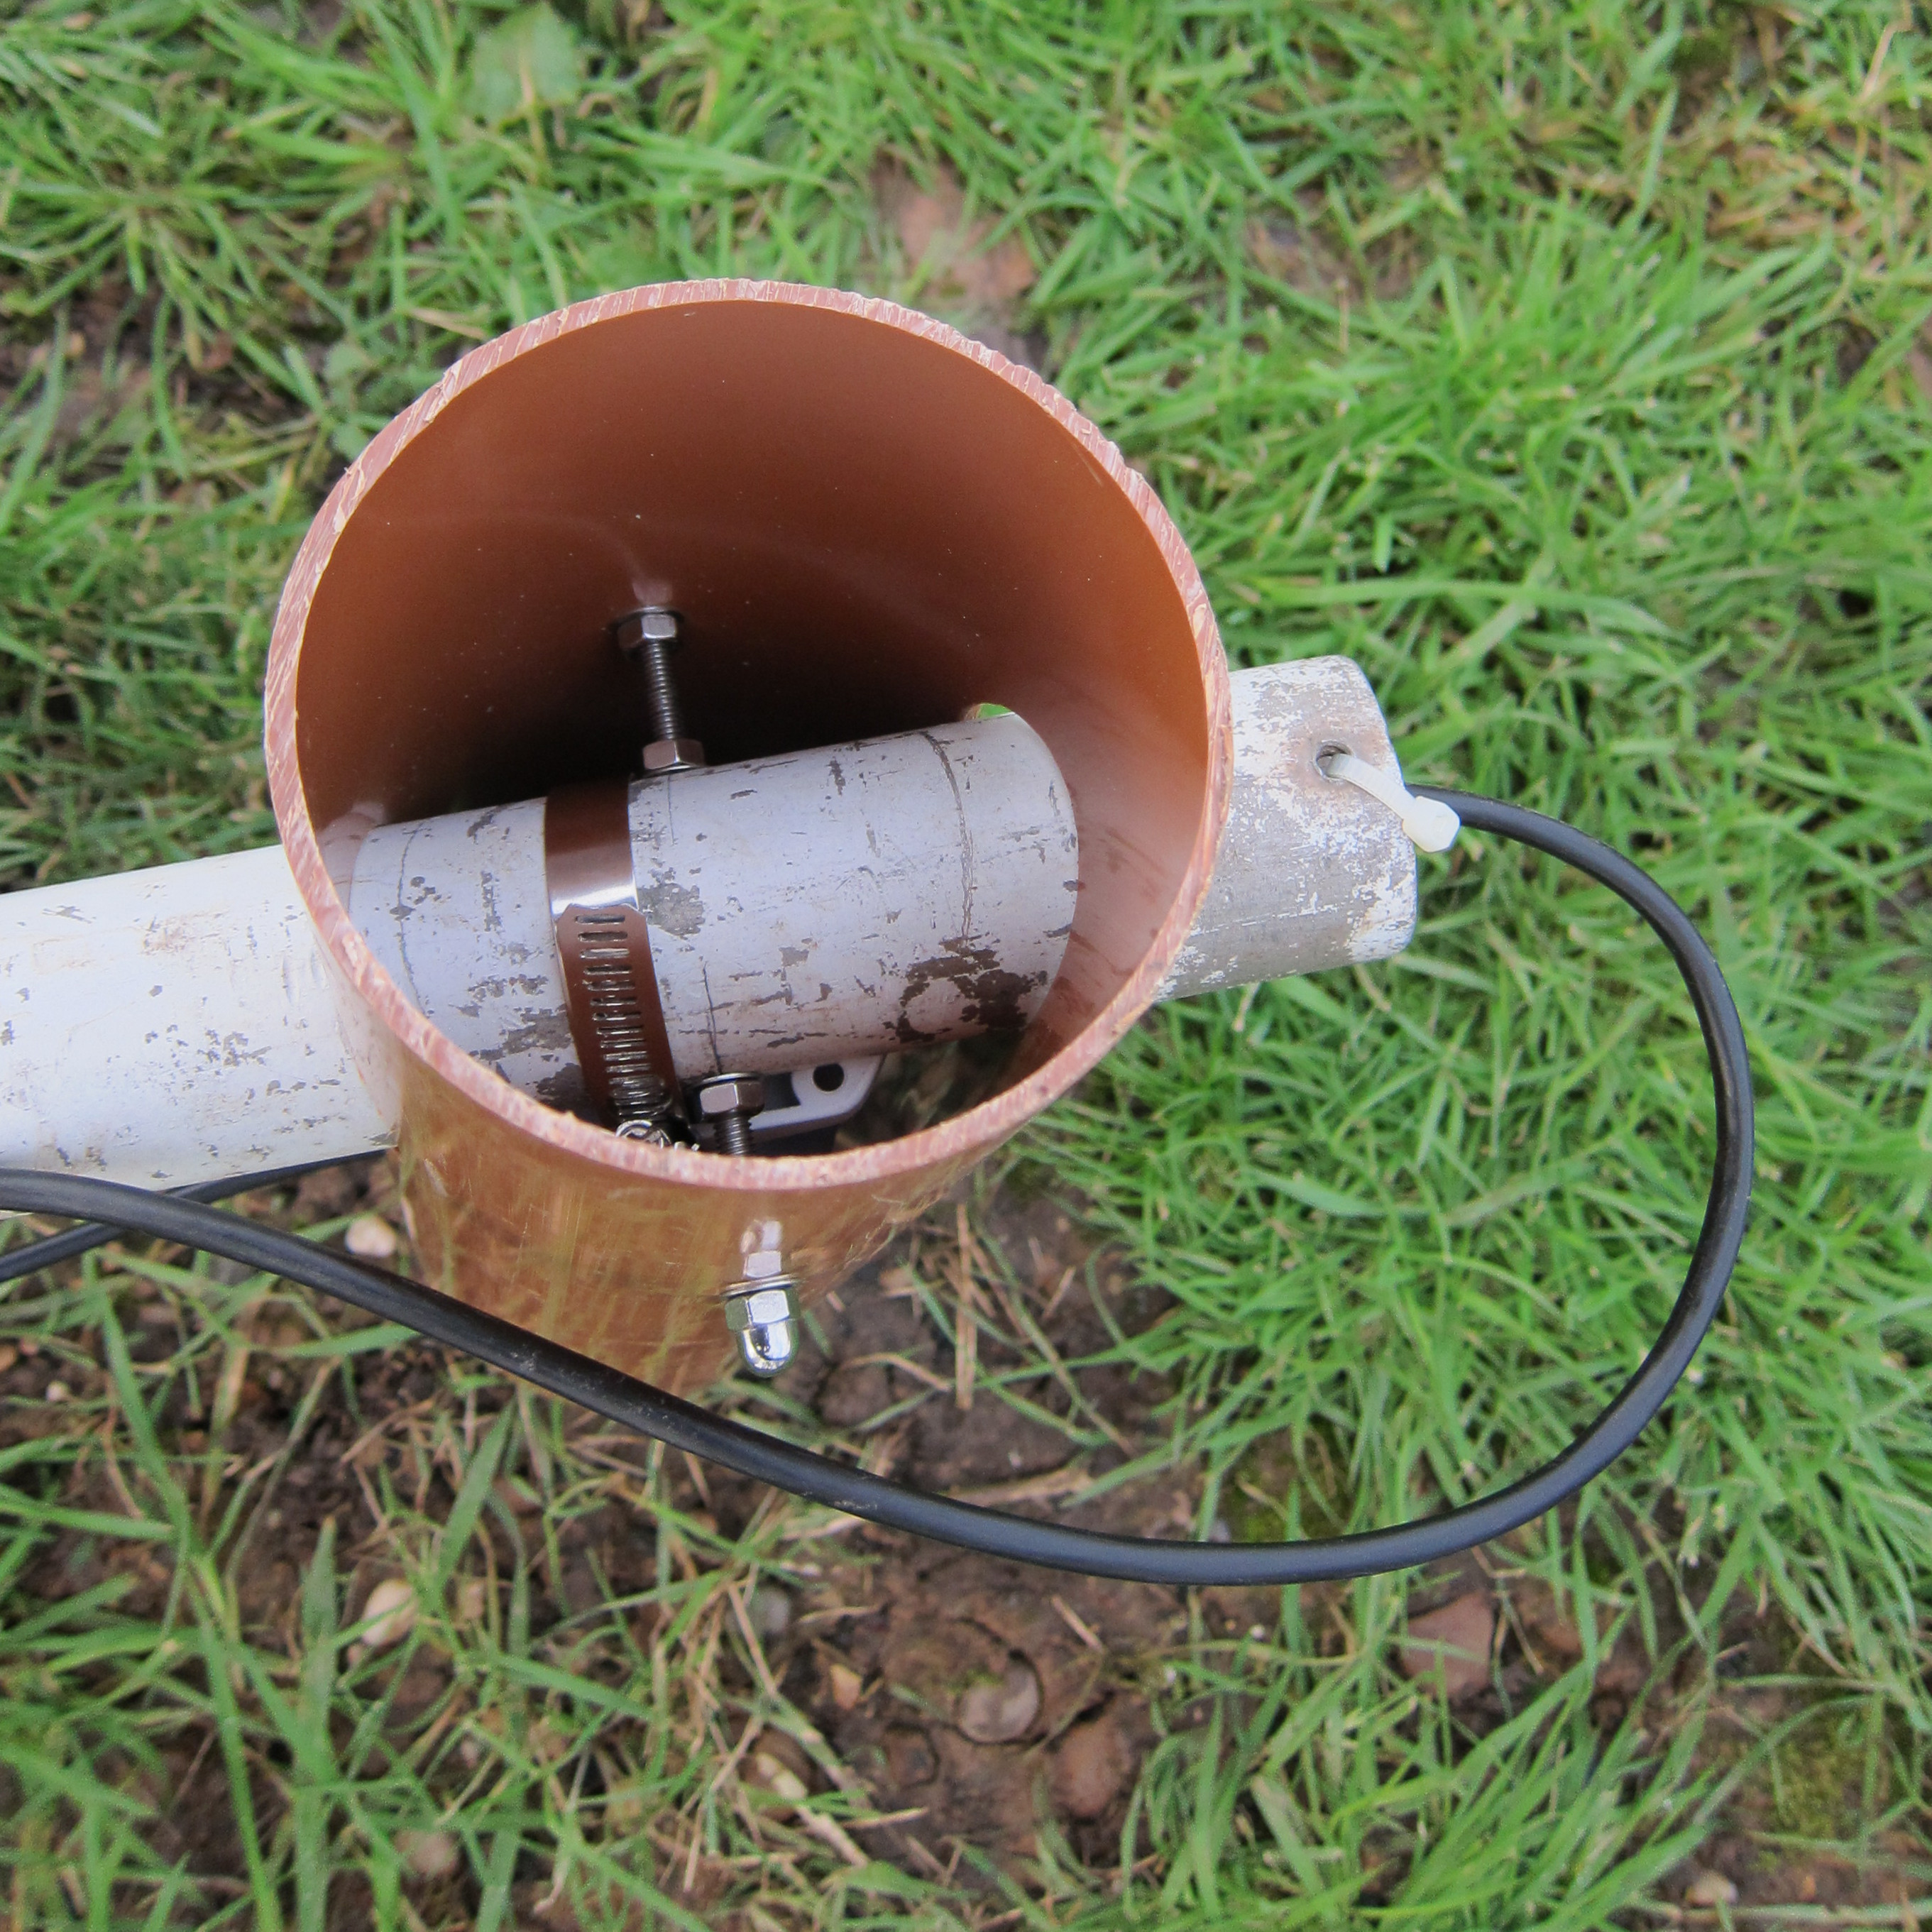
It proved surprisingly difficult to source a cap to close off the back end of the pipe (at a sensible price) – most of the plugs you can buy are for fitting into pipe sockets in place of a pipe and not going over the outside of a pipe. In the end I managed to get a Magnaplast-branded one from Hitchin Plumbing Supplies. I always intended to paint the pipe white but that doesn’t really seem necessary.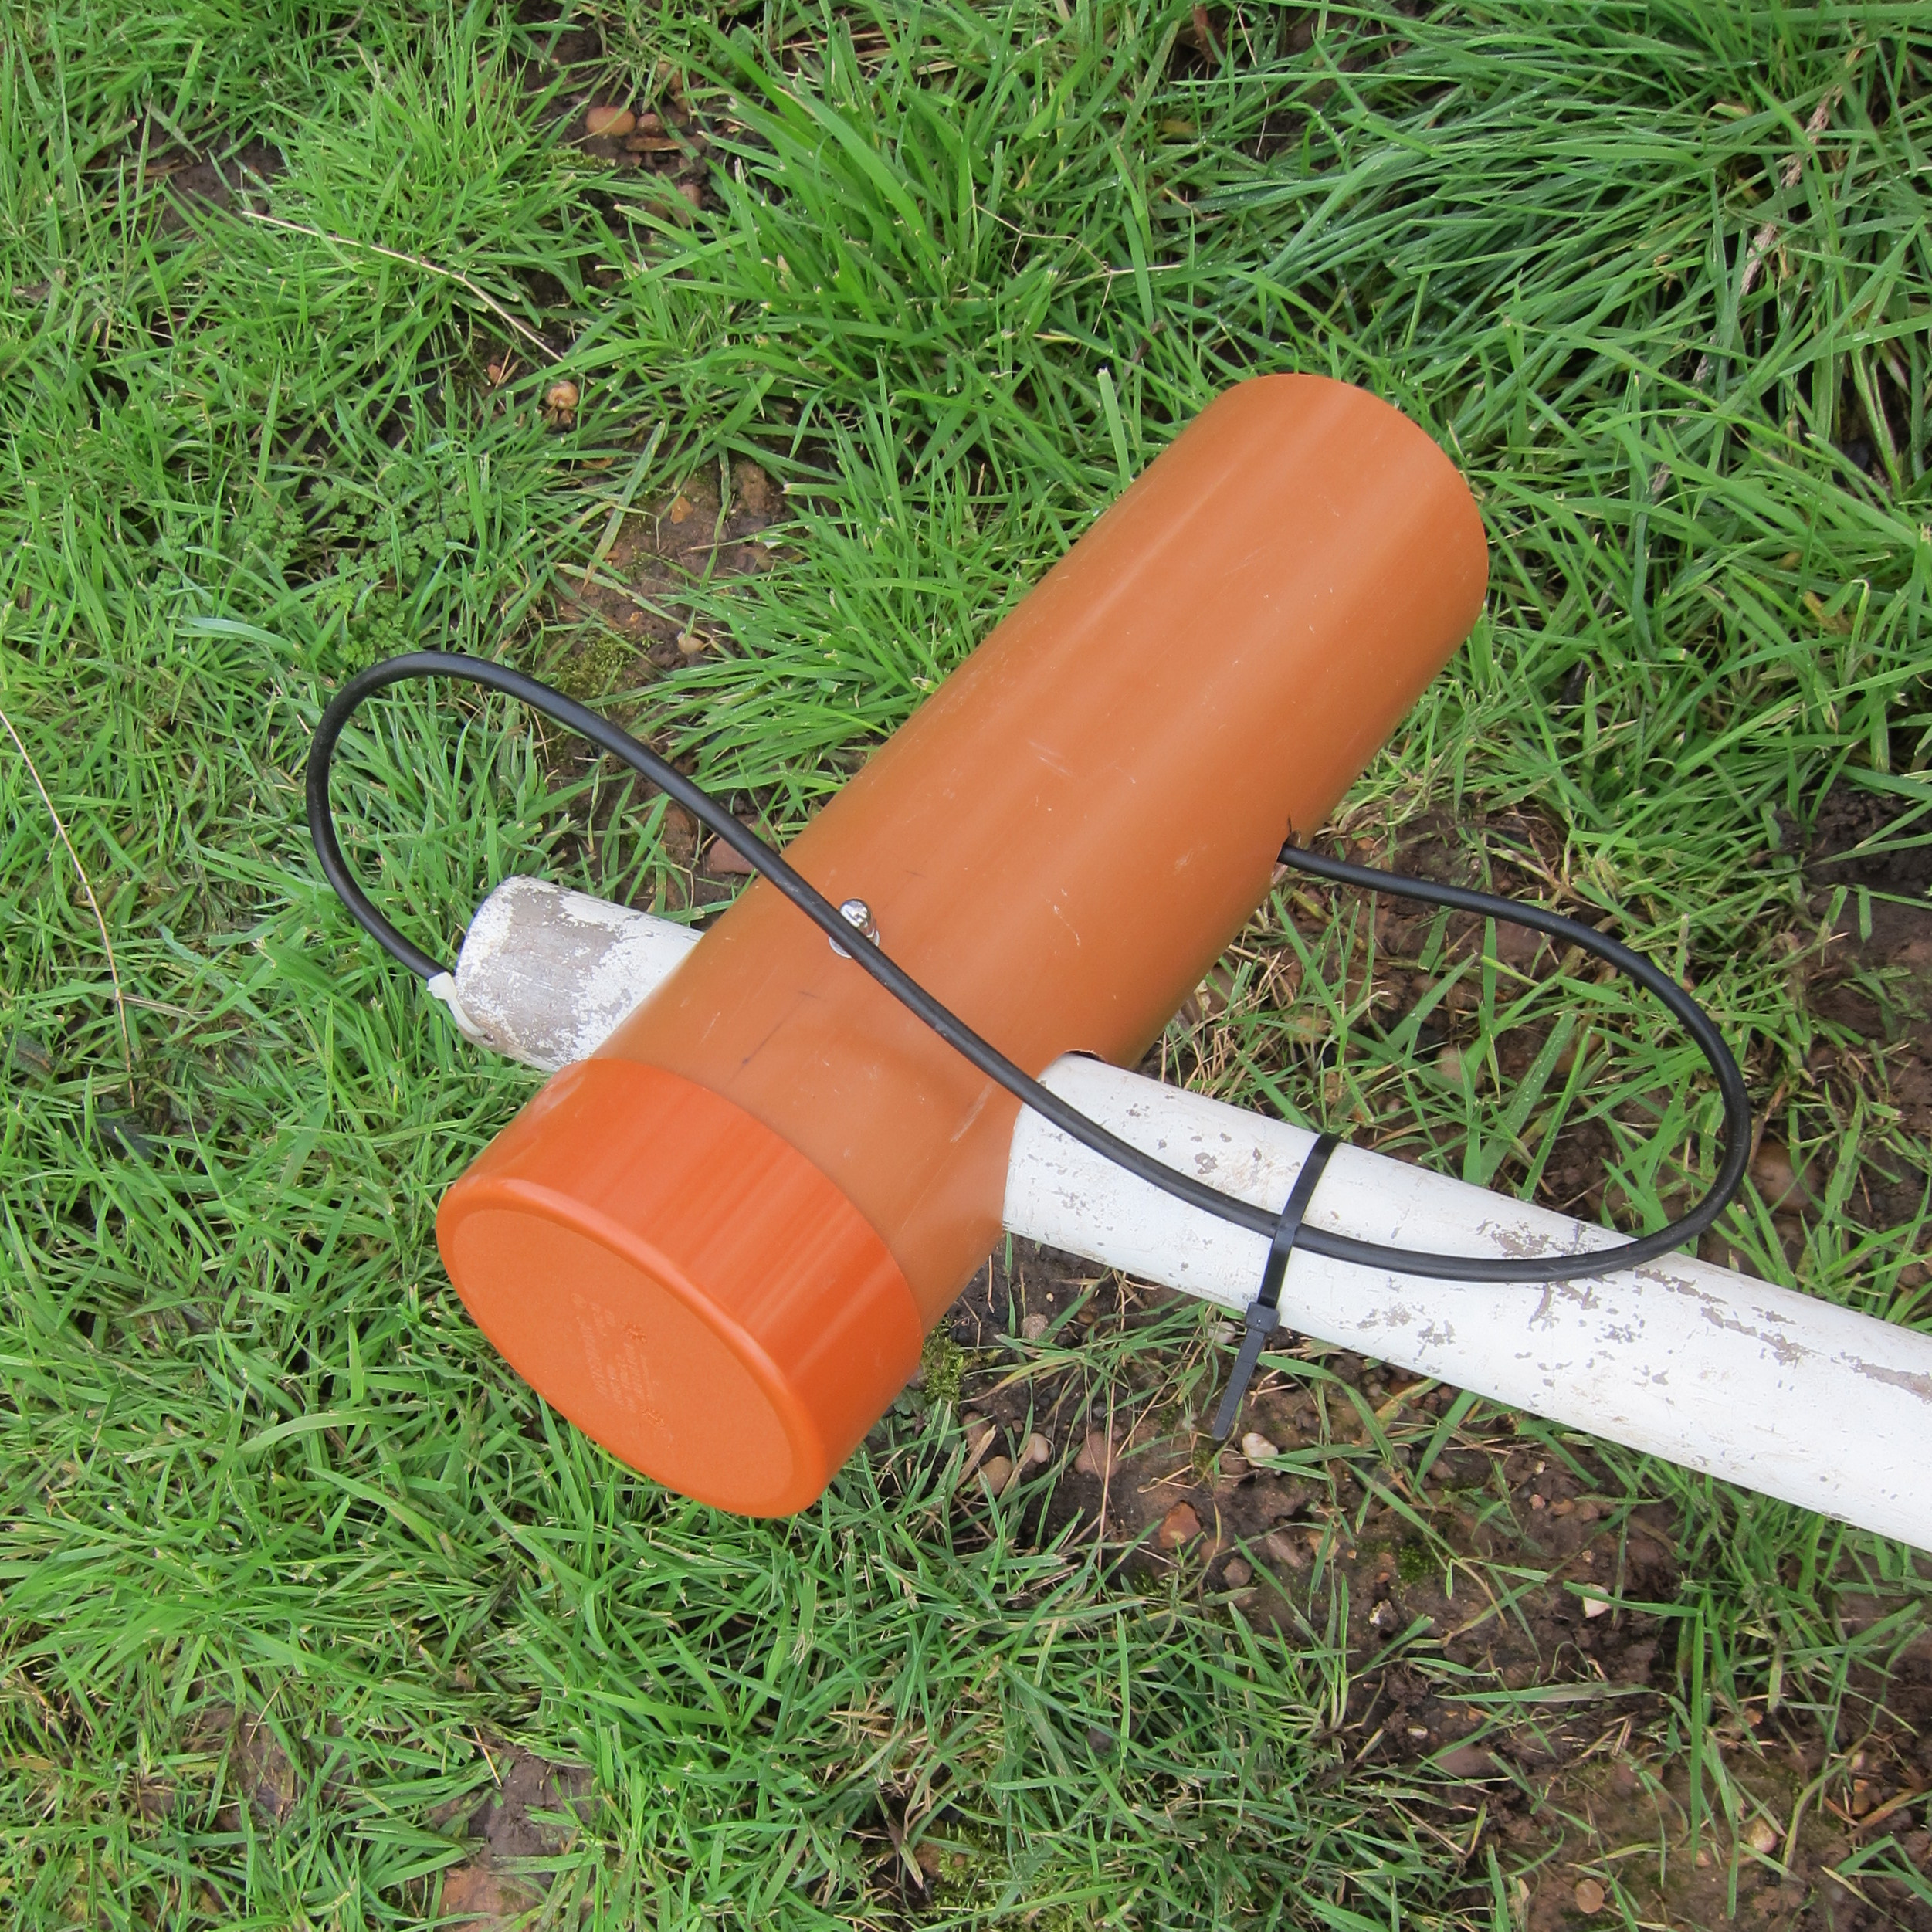
I wasn’t sure how far to recess the lens of the camera. It’s hard to tell from this shot but it’s about 25mm back from the end of the pipe, which seems about right.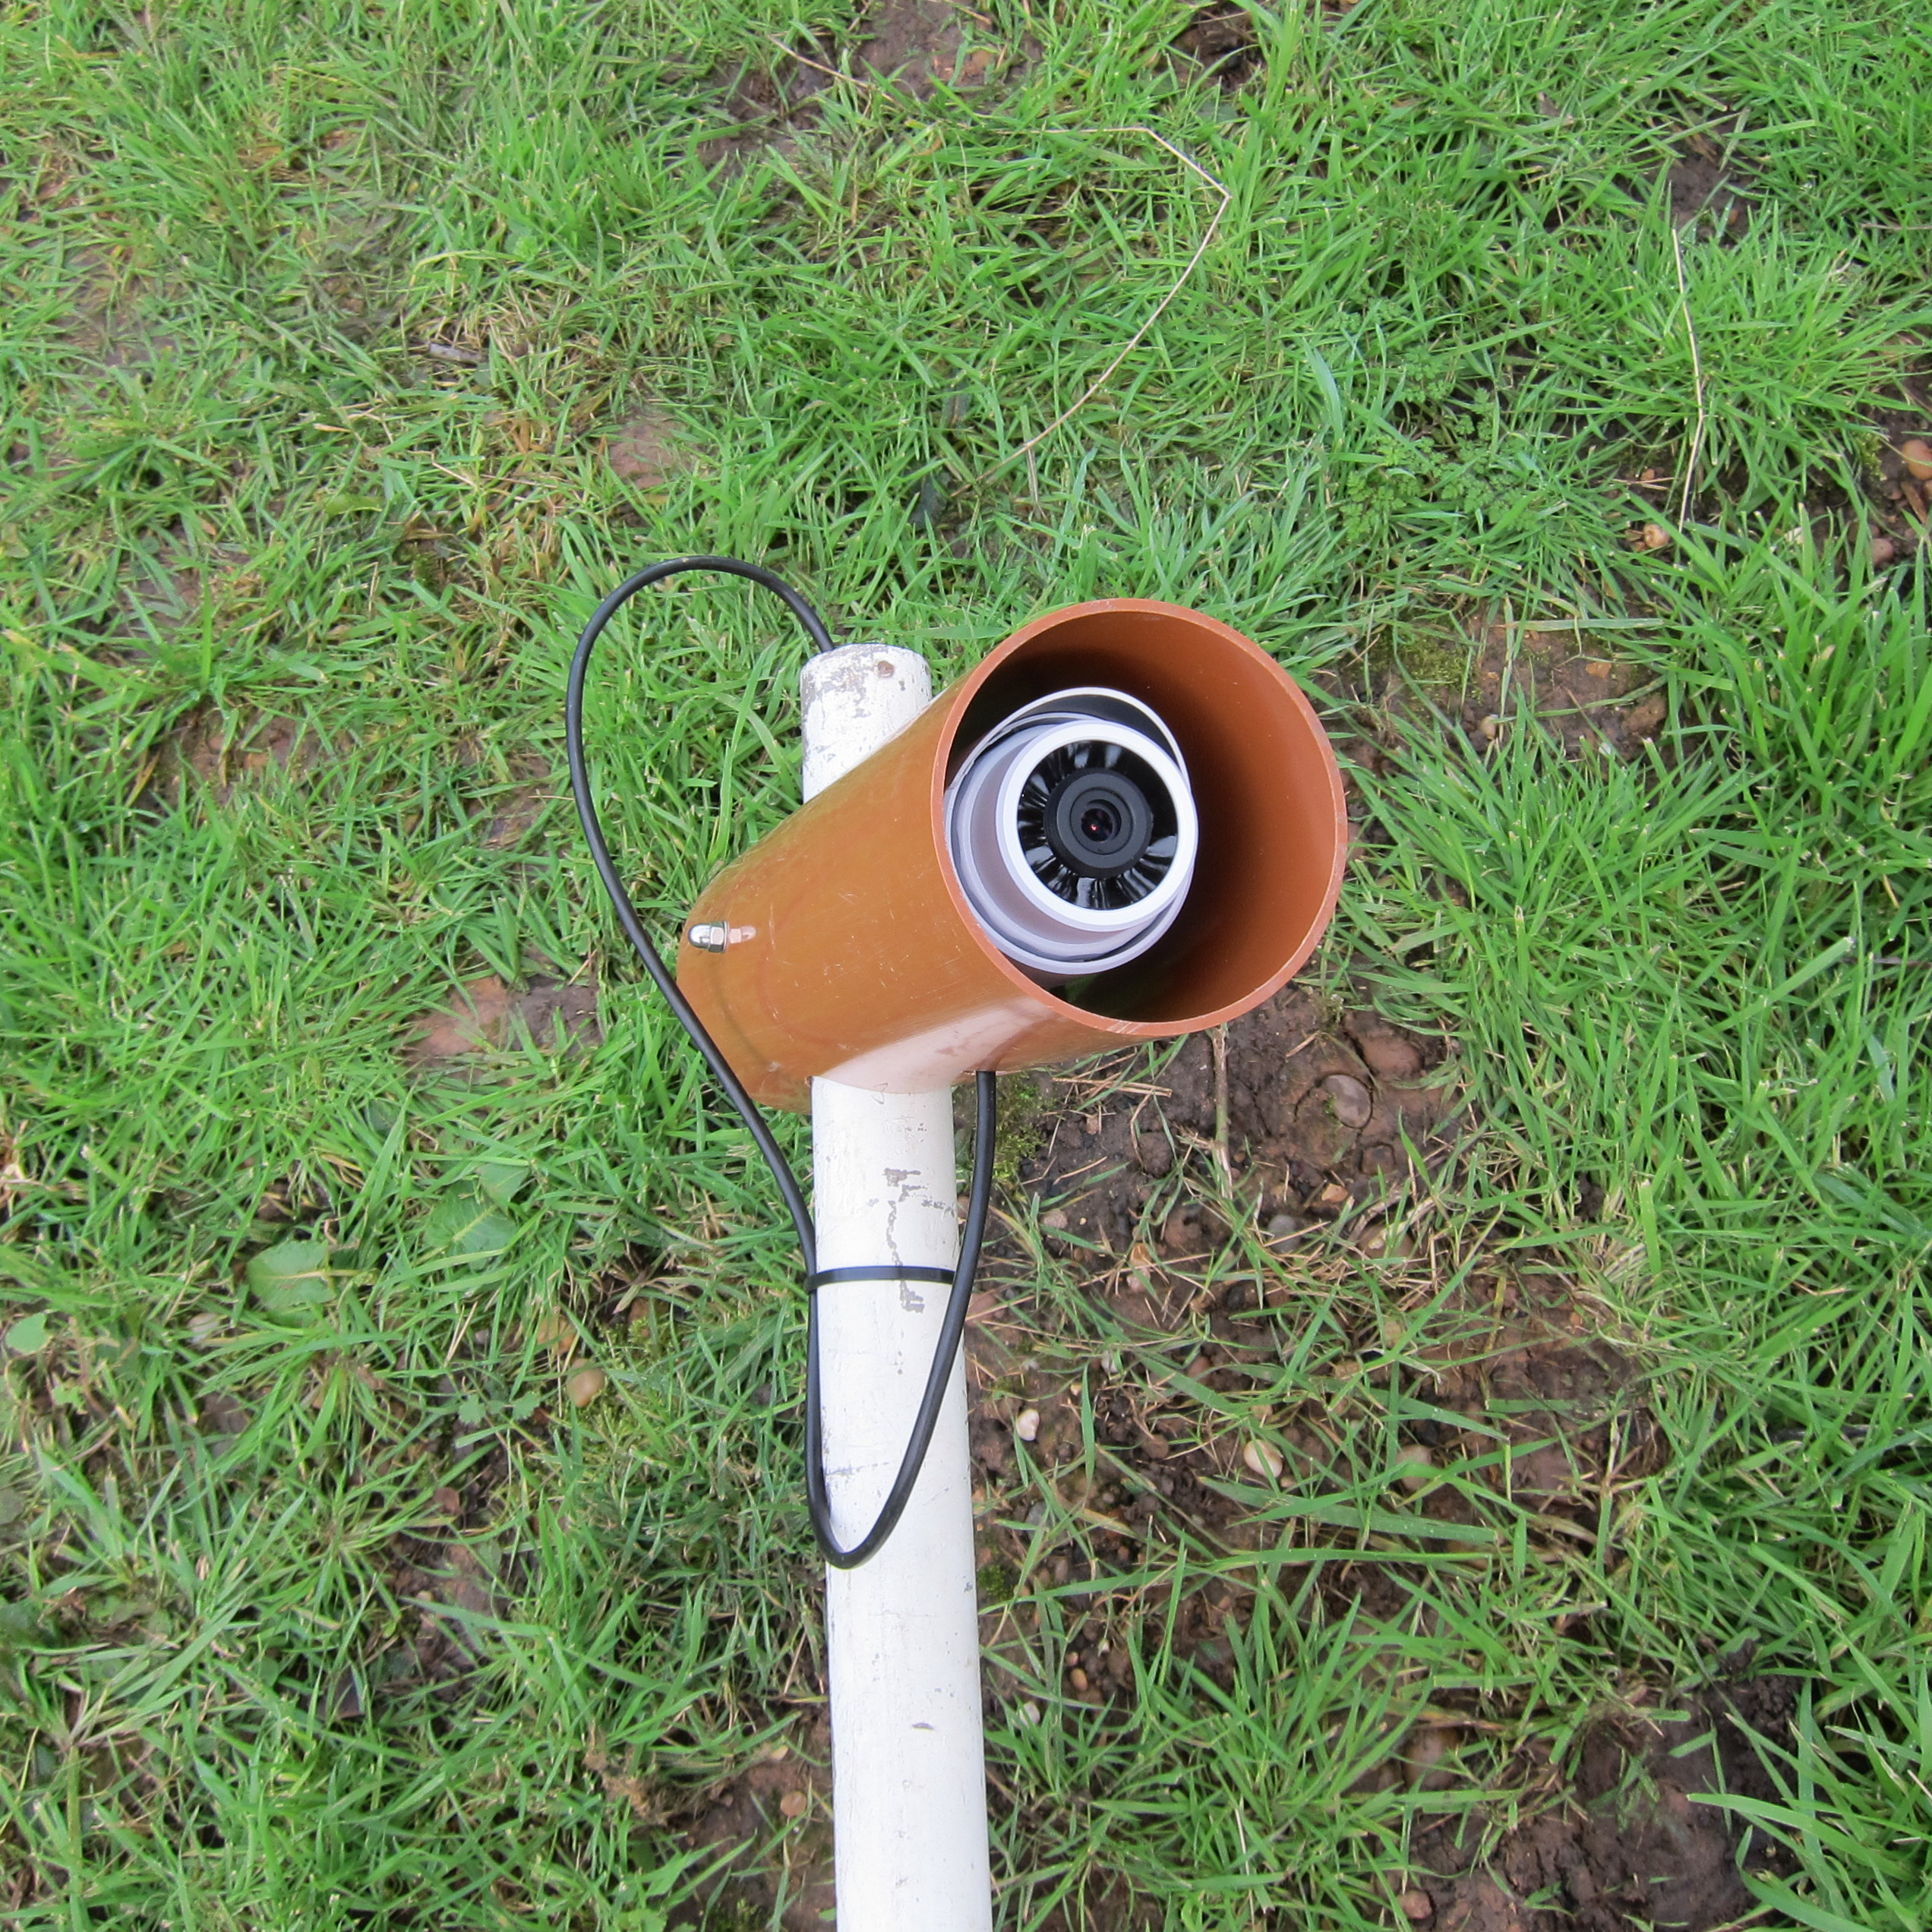
The Ethernet cable is Ubiquiti Networks TOUGHCable Pro which is is foil-screened and has a much tougher outer sheath than normal (internal-grade) CAT5E cable.
The finished article looks reasonably professional. The extra size and weight of the pipe does mean that the top of the (aluminium) pole moves more in the wind than it would with just the bare camera (I guess, though I haven’t done any proper comparative tests) and there’s enough movement to thoroughly upset the camera’s built-in motion detection logic. I suppose I could install some guy ropes – at least along the line of the fence – to try to steady it a little…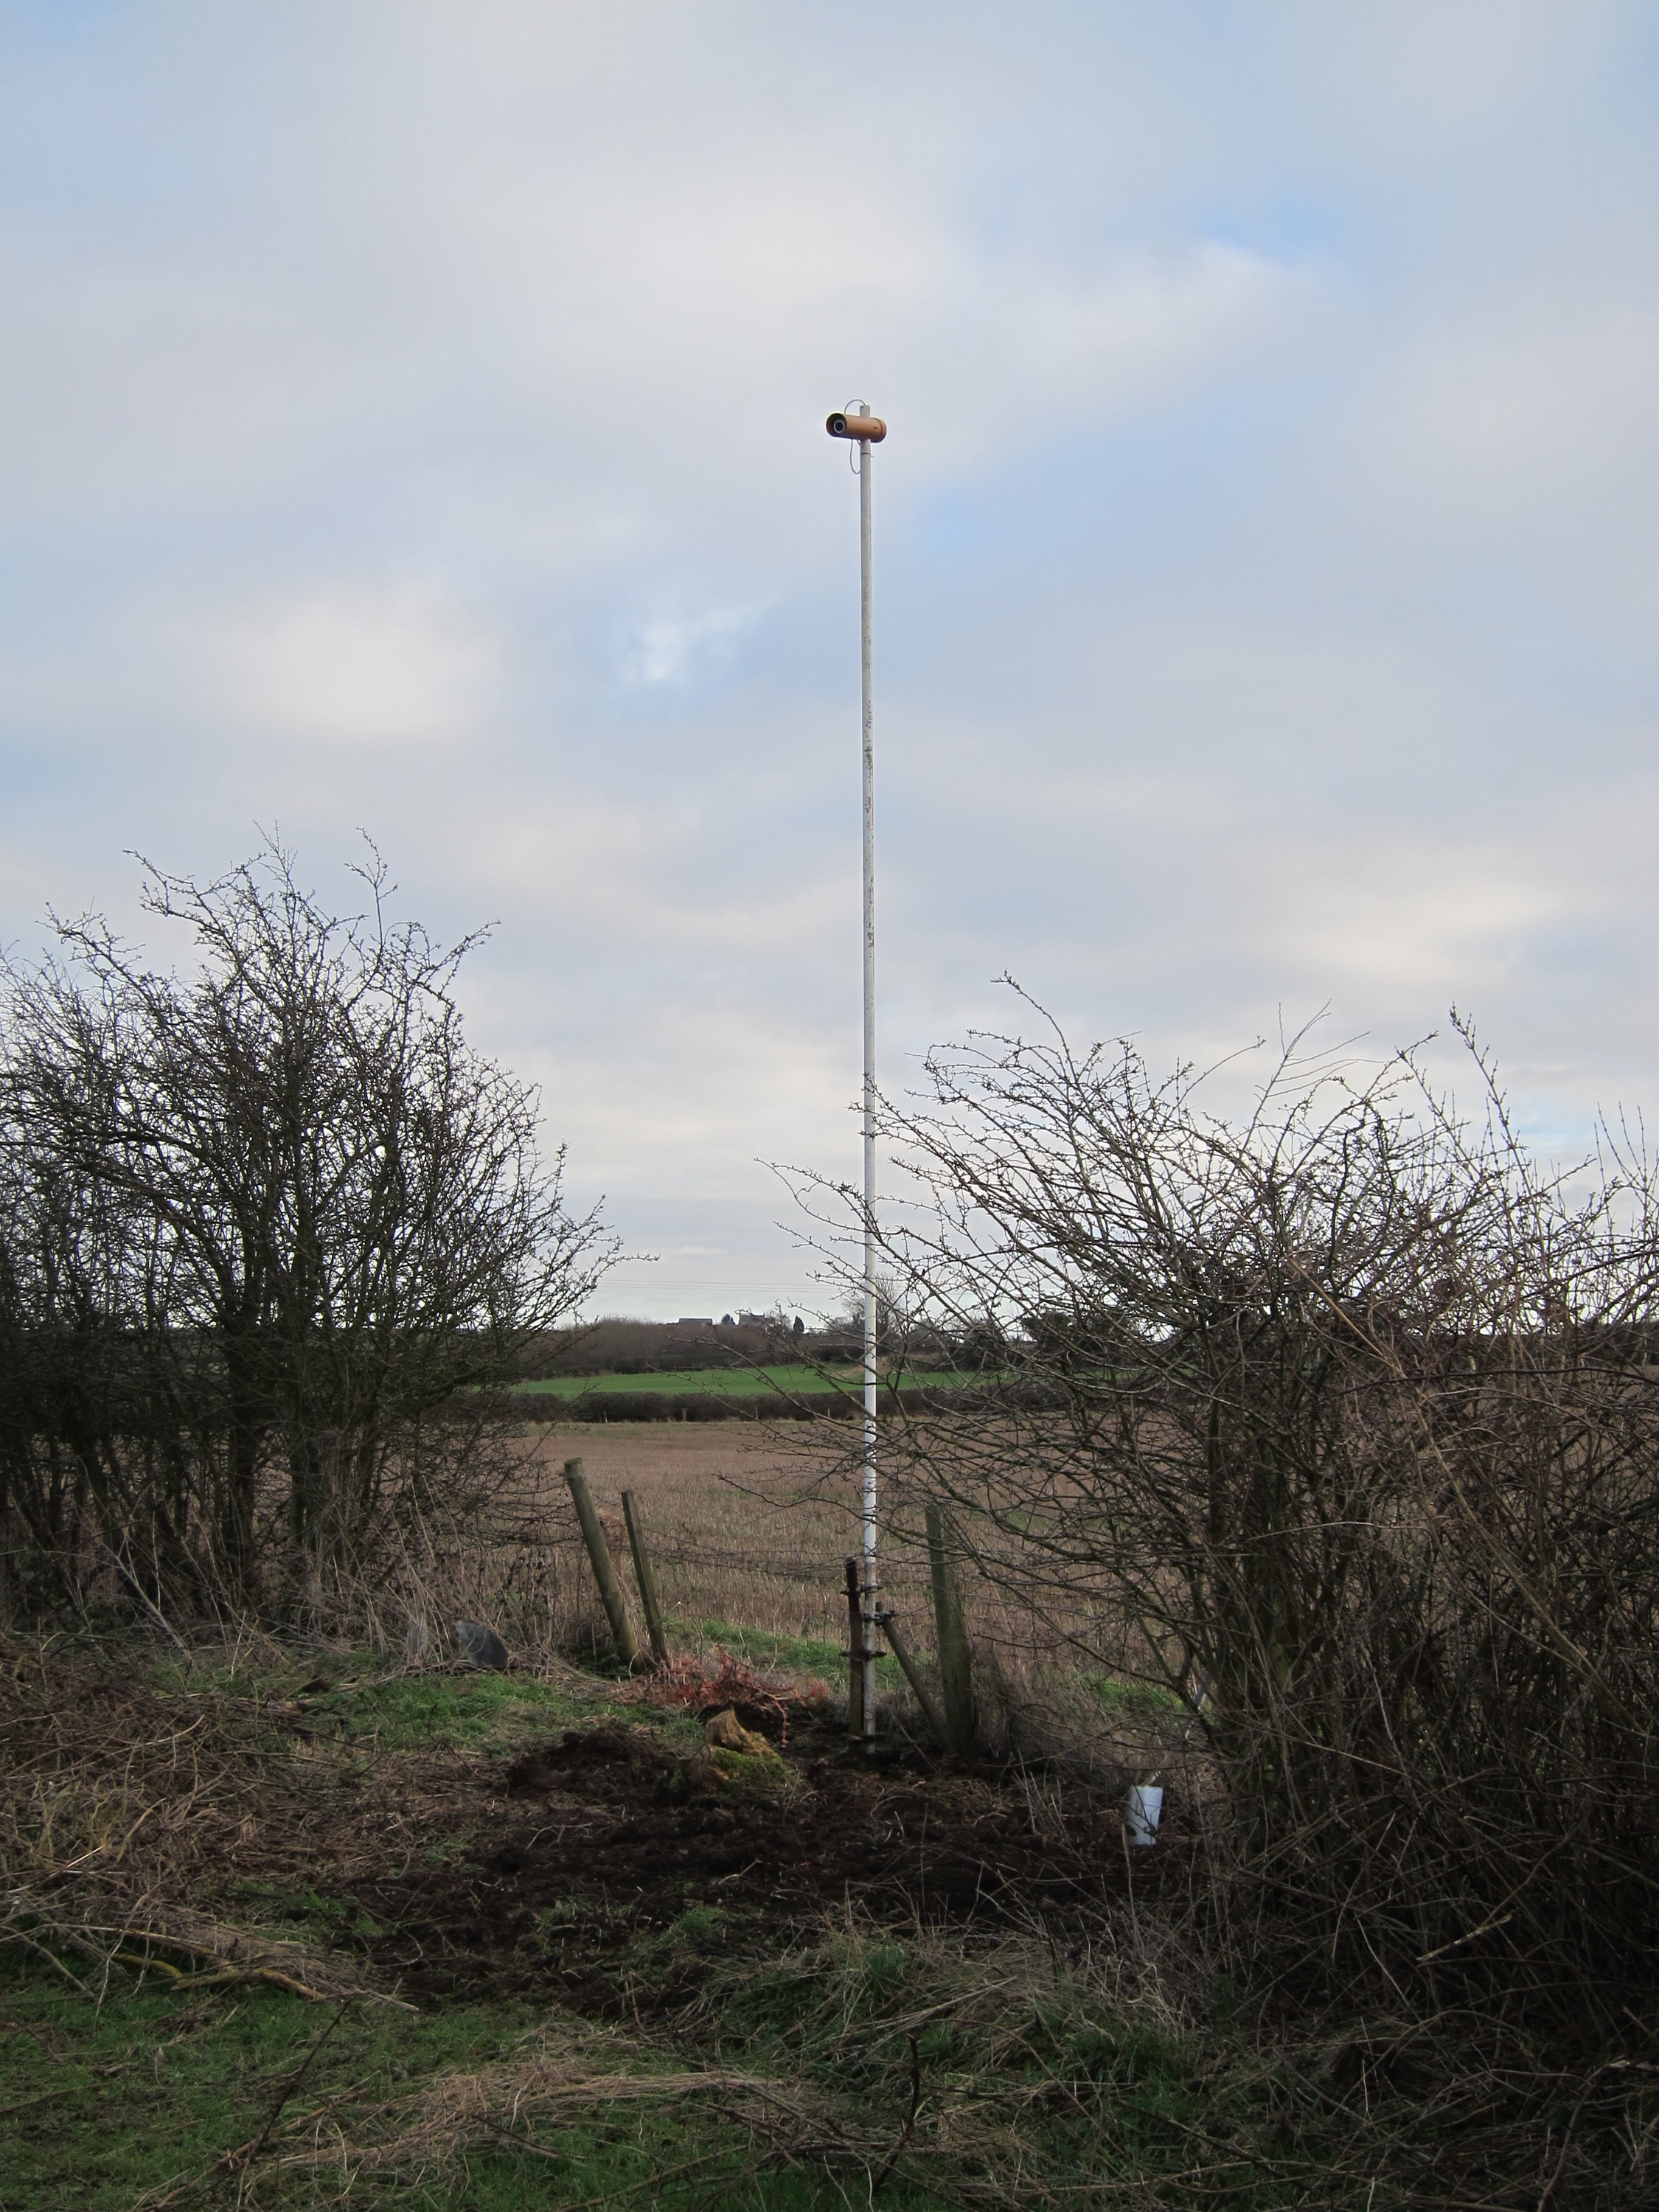
2015-08-23 – Addition of Guy Wires
Several months ago I decided I would add some guy wires to try to steady the camera a bit and I settled on using 4mm galvanized steel wire rope. That sounds straightforward enough but the wire needs attaching securely at the top of the pole and also into the ground, with some means of adjusting the tension, which needs a variety of additional hardware. I bought all the bits some while back but I’ve been putting off installing them since I knew I’d have to take the pole down to attach the fittings and I wasn’t particularly looking forward to that. However, I knew I’d never get it back into quite the same position as it was before so for continuity of the time-lapse video I’d need to do it before work started on site. Time to bite the bullet.
At the top of the pole each wire rope is attached to a stainless steel M6 “eye nut” on each end of a length of M6 screwed rod through holes drilled in the pole. There’s a locknut on each end too, for good measure, though those proved difficult to tighten much.
Since the camera isn’t pointing “straight ahead” it was necessary to align the fixings for the guy wires about 15 degrees off from the axis of the camera so the wires would follow the line of the fence.
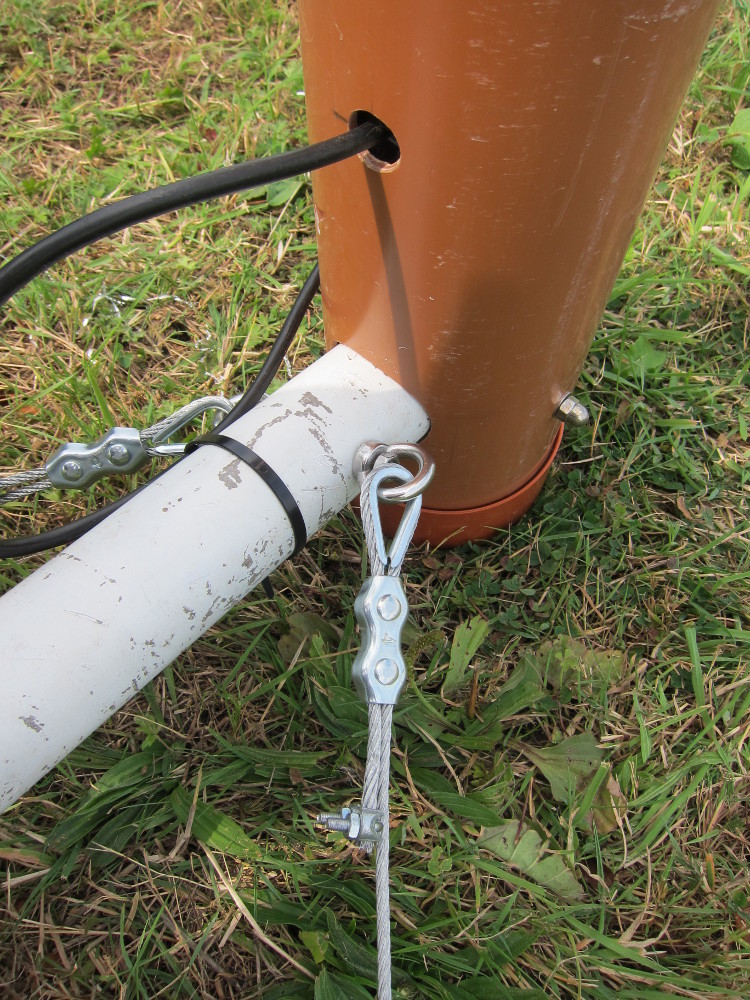
Guy wire attachment at the top of the pole. The extra clamp is an attempt to stop the end of the wire from fraying.
The wire rope came in 10m lengths which seemed about right so I didn’t bother cutting it and simply located the angle iron stakes where the 10m lengths reached the ground.
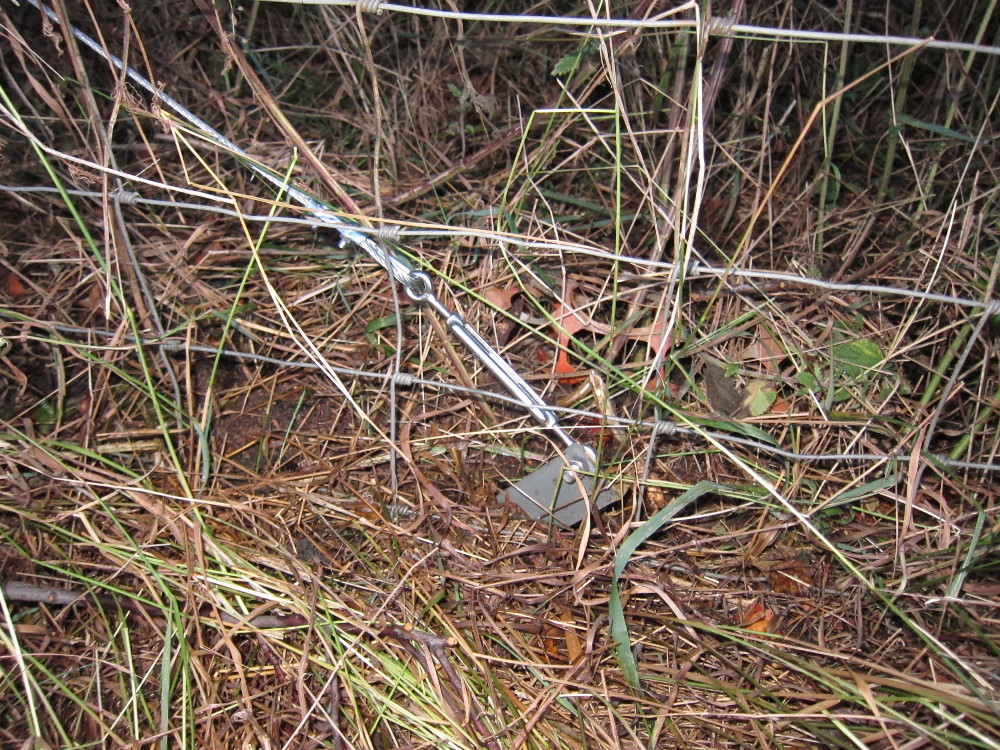
Wire rope attachment to stake, with tensioner
At 10m long (less a bit at each end where the wire rope is doubled back on itself through the fixing clamp) the wires are at roughly 45 degrees.
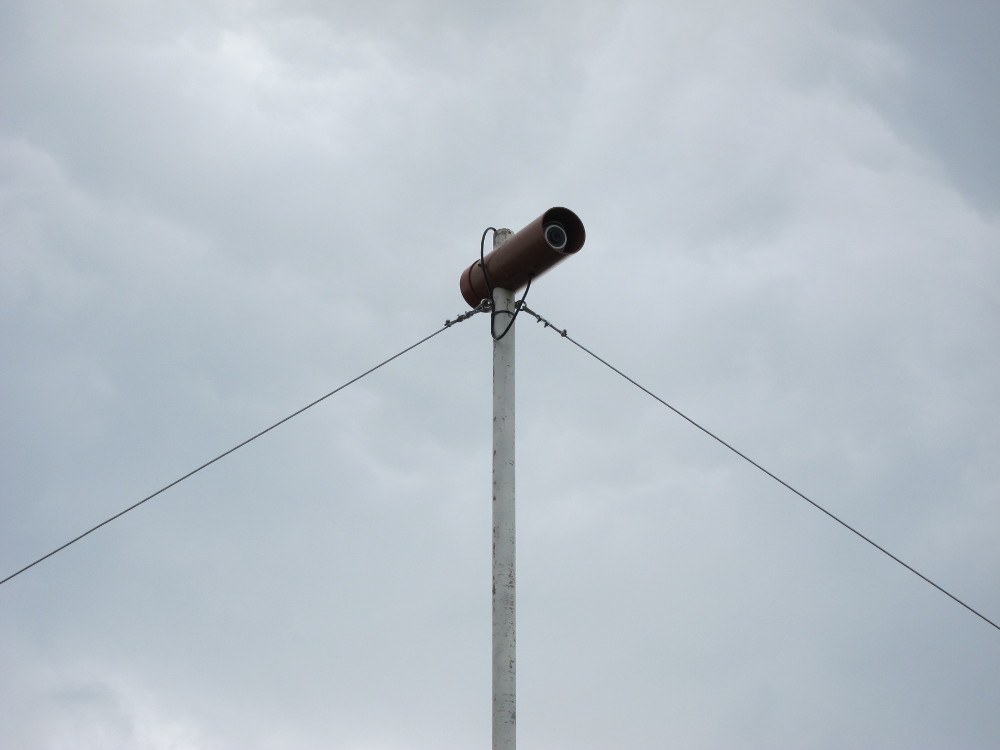
Close up of guy wires attached to camera pole
While the guy wires are not particularly obvious in some lighting conditions, it’s possible to make them out in the photo below.
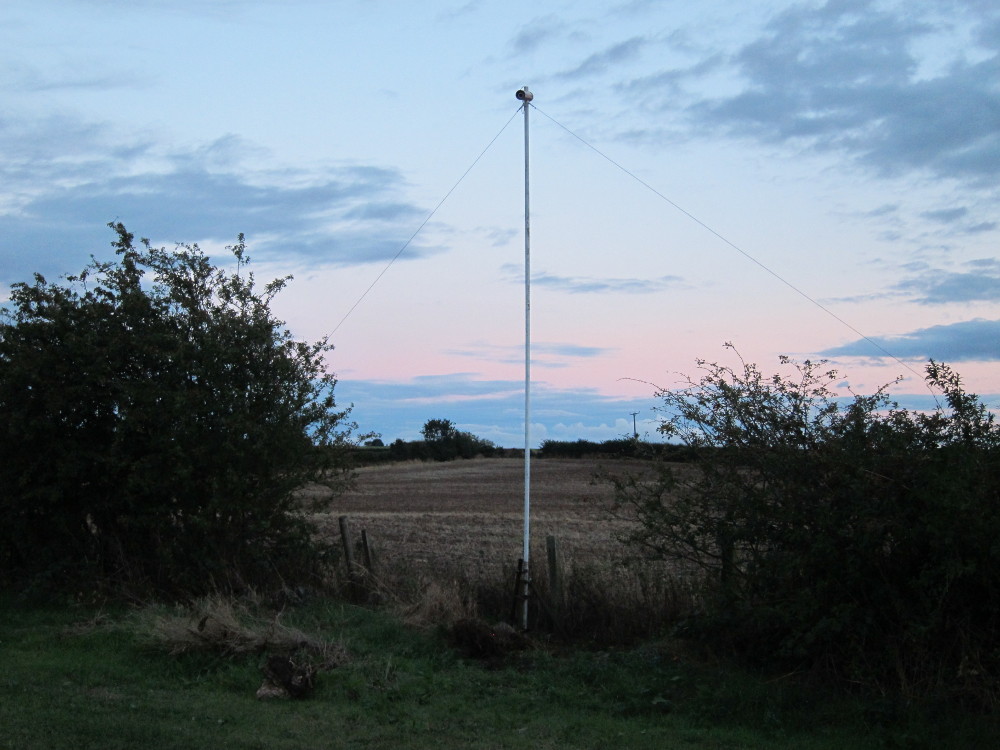
Guy wires installed on camera pole
Grabbing Still Frames as JPEG Files
I’m using a camera running version 3.0.9.25 of the UVC firmware. Some people undertaking similar projects with older cameras and / or firmware are grabbing single frames out of the RTSP video stream presented by the camera, but my camera doesn’t offer direct RTSP access. There are some references to this having been disabled due to security concerns. (Indirect RTSP access, via the separate UVC controller application (running on a separate machine – either the UBNT NVR controller or a generic Ubuntu Linux installation) is available, but not exactly ideal.)
In many ways that’s a blessing in disguise since it made me hunt for an alternative solution and it turns out the camera is constantly updating a still-frame JPEG file in its local Linux file system – /tmp/snap.jpeg – so all you need to do is copy that file on a regular basis and name the copied file with a suitable date- and time-stamp so that they form a time-ordered sequence. Each image has a resolution of 1280 x 720 pixels, which is directly compatible with 16:9 720p HD video.
My solution to collecting the files on a regular schedule and storing them somewhere safe(-ish) is to use Raspberry Pi running Debian Linux which is cheap to leave running 24×7. That copies the camera’s /tmp/snap.jpeg file over the network using SSH (actually the ‘scp’ command), triggered on a regular schedule using ‘cron‘. The camera doesn’t permit unauthenticated SSH access (which is A Good Thing) but it’s easy enough to arrange for SSH to use a security key which the camera is told to trust, as described below:
- The first step is to create a public/private key-pair just for this purpose. The private key needs to be configured without a pass-phrase, which makes it less secure for normal use but acceptable for grabbing frames from the camera. On any Linux machine run: ssh-keygen -t rsa -N “” -f uvc_rsa
- The generated Public key (in file uvc_rsa.pub) needs to be copied into file ~/.ssh/authorized_keys on the camera, creating that file if it doesn’t already exist
- When running the ‘scp’ command on the Raspberry Pi, use the -i argument to specify the location of the generated Private key file (uvc_rsa), so that ‘scp’ runs without prompting for a password
When copying the files from the camera, they need to be named carefully so they can be accessed in the correct order when assembling them into a video later. Bear in mind the images will be collected over a long period of time, most likely crossing into and out of daylight savings time (BST in the UK) so it’s best to keep them referenced against UTC (aka GMT). The ISO 8601 standard defines how to do this:
- Dates are specified as: yyyy-mm-dd (e.g. 2015-01-31), either with our without the hyphens.
- Times are specified as hh:mm in 24-hour format (e.g. 15:45), with a Z appended if the time is in UTC rather than the local time zone, and either with or without the colon as a separator character.
- When combining dates and times together, specify the date followed by the time and separated by a ‘T’ character, with no spaces.
- The full definition is therefore something like: 2015-01-31T15:45Z or, without the separator characters, 20150131T1545Z.
In general it is preferable to include the separator characters – the hyphens and the colon. The hyphens rarely cause a problem but the colon character is problematic when present in UNIX file names since it is treated as a ‘special character’ so for use in file names it is best to omit the separators.
A simple UNIX shell script to copy the current image from the camera (with hostname ‘uvc’) and name it using the current date and time looks like this (assuming the local user account is ‘pi’):
#!/bin/bash
datetime=`date --utc +%Y%m%dT%H%MZ`
filename=/home/pi/$datetime.jpg
scp -i /home/pi/.ssh/uvc_rsa ubnt@uvc:/tmp/snap.jpeg  $filename
A ‘crontab’ file to run this script every day at noon (local time) would look like this:
0 12 * * * /home/pi/uvc-frame-grab.sh
Choosing how often to grab frames can be tricky: too many is definitely better than too few, obviously (since throwing away the ones you don’t want is much easier than going back in time to take extra shots you missed 🙂 ).
Night-time shots will give you a black “flash” in the finished video, unless you can find and delete any dark frames (or avoid taking them in the first place, by adjusting the hours at which images are grabbed at different times of the year). One option is to analyse the grabbed JPEG file using ImageMagick’s ‘identify’ command to assess the ‘skewness’ of the image. I’m not completely sure what ‘skewness’ corresponds to, but my night-time shots have a high skewness (typically 9 or thereabouts) whereas day-time shots have a much lower skewness (typically less than 2). A Bourne Shell fragment to move any ‘dark’ shots to a separate directory looks like this:
skewness=`identify -format "%[skewness]" $filename`
dark=`echo $skewness'>'5.0 | bc -l`
if [ $dark == 1 ]
then
    mv $filename /home/pi/dark/
fi
(You can simply delete the files instead if you wish, but it’s safer to move them and check them occasionally in case you need to refine the ‘skewness’ threshold.)
As an alternative to using the skewness, you can exploit the fact that JPEG image compression works more effectively on images that have large blocks of the same or similar colours and hence a 1280×720 image will compress down to a smaller file size when it is closer to all being a single colour. This effect seems quite pronounced and in practice I found that using file size is better at detecting ‘grey’ images captured in very low light levels than relying on skewness – and it requires much less computation since the image content isn’t being processed at all. You will need to do some experiments to determine the threshold for your own circumstances – for me it’s around 65KB. A comparable Bourne Shell fragment to the one above which reacts to the file size looks like this:
size=`stat -c%s $filename`
dark=`echo $size'<'65000 | bc -l`
if [ $dark == 1 ]
then
    mv $filename /home/pi/dark/
fi
Videos typically play back at 25 frames per second, and ideally you want one still image per frame of video, so something like 1 shot per hour (in daytime) is a good starting point, giving something like 1/2 second of video per day, so a one-year video will play back in 3 minutes.
An optional extra step is to send each copied file off to another location (e.g. a secure file server on the Internet), just in case anything happens to the Raspberry Pi.
Assembling the JPEG Files into a Video
Assuming the image capture process is working correctly, that will deliver a set of JPEG files named something like 20150131T1200Z.jpg
For Linux, there are two main command-line utilities which commonly seem to be used when creating a video from such files:
Following various tests using both utilities, I settled on using FFmpeg – mostly because that is the one I got to grips with first. The results I was getting with FFmpeg started to make sense once I realized that the command-line arguments affect either the input processing or the output processing (but generally not both) depending on the order in which those arguments are specified. Specifically, arguments listed before ‘-i’ (which identifies the input file) affect the input processing, and those specified after ‘-i’ affect the output processing.
A basic FFmpeg command line to generate a time-lapse video in H.264/MPEG-4 format from a set of JPEG files named as described above looks like this:
ffmpeg -r 10 -pattern_type glob -i '*.jpg' -vcodec libx264 -r 25 video.mp4
The repeated ‘-r’ arguments specify that the input frame rate is 10 fps and the output frame rate is 25 fps (which is pretty much standard for a video) so the resulting video shows each input frame for 1/10 of a second, though actually the file contains several identical output frames for each input frame. Many video players don’t like displaying low frame rates, so it’s best to stick with an output frame rate of 25.
You should adjust the input frame rate depending on how rapidly things are changing between each pair of source images and how long you want the finished video to run for.
Additional command-line arguments can be specified to refine the processing behaviour. For example:
- To scale the size of the output video so that it is different from the input, use the ‘-s’ (size) argument followed by a width x height specification, and remember to place this after the ‘-i’ argument (and its accompanying value) so that it affects the output processing. For example, adding the following will scale the video to 640 pixels wide by 360 pixels high:
-
-s 640x360
-
- To specify that the output file should be automatically overwritten if it already exists, add the ‘-y’ argument (anywhere on the command line)
Further Reading
- www.linitx.com blog post about adding FTP to the AirCam Mini which mentions /tmp/snap.jpeg on the camera file system
- community.ubnt.com blog post about an Aircam timelapse project
![]() UniFi Video Camera Time-Lapse Video by Marsh Flatts Farm Self Build Diary is licensed under a Creative Commons Attribution-ShareAlike 4.0 International License.
UniFi Video Camera Time-Lapse Video by Marsh Flatts Farm Self Build Diary is licensed under a Creative Commons Attribution-ShareAlike 4.0 International License.