
Week 27, Day 1:
- On Sunday I’d carefully cleaned the areas of the concrete floor that are going to be polished in readiness for the Ram Board protective covering which was installed first thing this morning – this allows the concrete to continue curing while protecting it from damage
- The main photo shows some external wall insulation over the SIPs panels at the top right – see below for a clearer shot
- The cavity wall insulation is due to be installed shortly but the cavity hadn’t been closed so a lot of time was spent carefully cutting and installing insulation boards between the windows and the outer skin of cavity wall blockwork
- There were some small gaps between the plywood frames supporting the doors and windows and the blockwork, which are in the process of being filled with airtight foam – they will also get an airtight tape covering
Week 27, Day 1
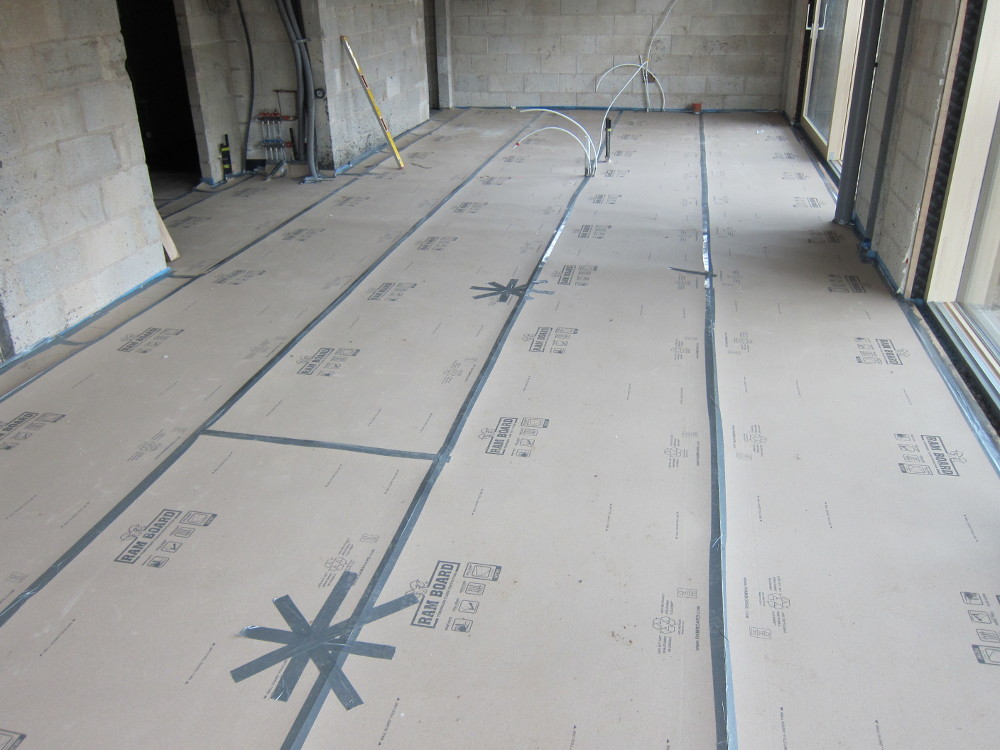
Ram Board protective cover over the to-be-polished concrete floor
The starburst shapes mark the location of the electrical floor boxes which have had their lids removed and hence won’t support any weight. Each sheet of Ram Board is roughly 1m wide.
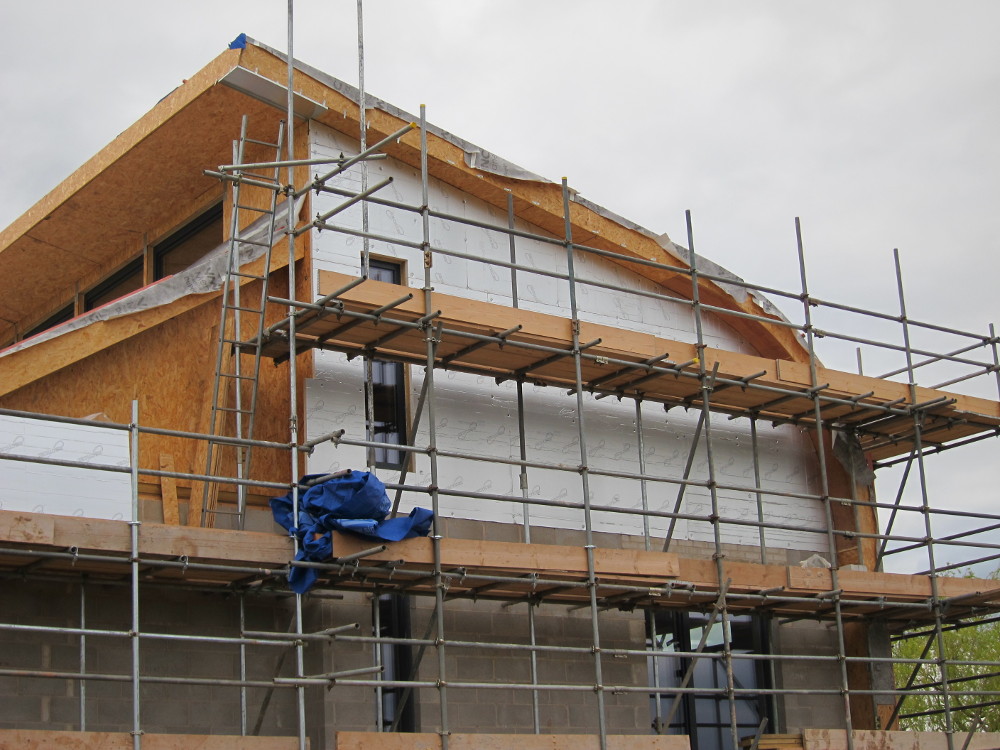
50mm Reticel insulation boards on the outside of the SIPs
This extra 50mm of insulation was included in the design before the SIPs were manufactured so it intentionally brings the outside of the SIPs flush with the outside of the masonry.
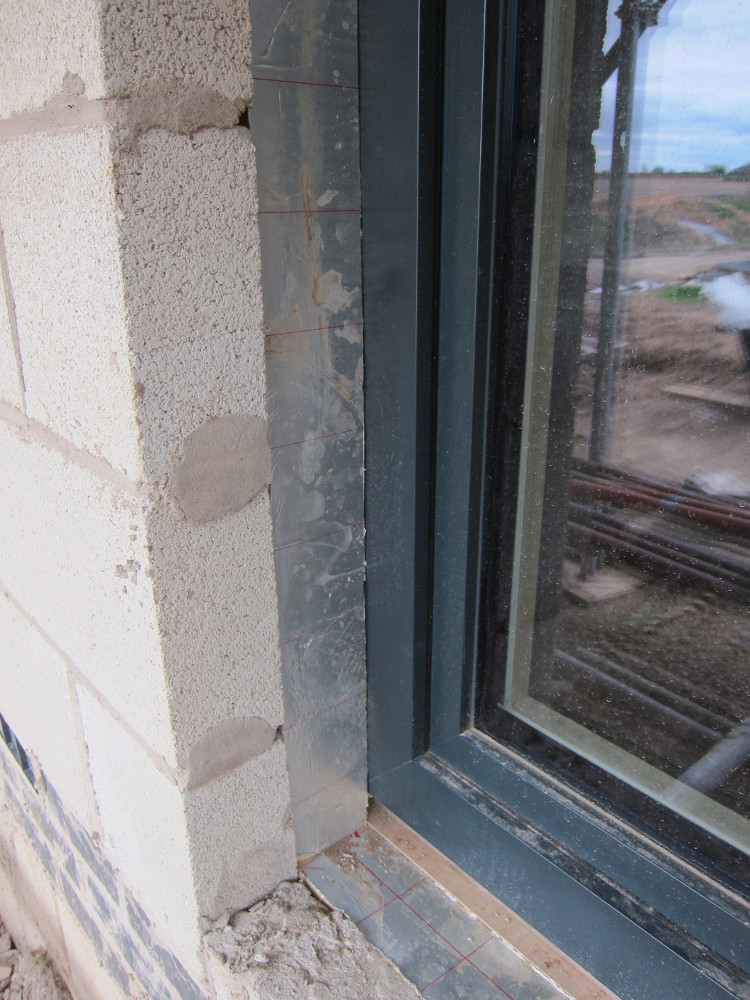
Insulation boards closing the cavity outboard of the windows
![]() Week 27, Day 1 by Marsh Flatts Farm Self Build Diary is licensed under a Creative Commons Attribution-ShareAlike 4.0 International License.
Week 27, Day 1 by Marsh Flatts Farm Self Build Diary is licensed under a Creative Commons Attribution-ShareAlike 4.0 International License.
Hi,
We are building hollow block cavity wall with cavity Rockwool insulation and you recessed window is very similar to ours. We plan to stucco the deep reveals to the windows.
I was curious how you and where you mounted your windows and was there a window nailing fin or was it strapped?
Thanks
David
Hi David,
Good question! Very much with a focus on avoiding a thermal bridge between the two skins of block-work, the windows are mounted inside rectangular plywood boxes that deliberately avoid bridging across the cavity and are instead mounted off the inner skin of block-work (only) and extend just beyond the middle of the cavity (the window being mounted in the middle of the cavity). The windows themselves are screwed into these plywood boxes, through the window frame sides/top/bottom.
See http://www.marshflattsfarm.org.uk/wordpress/?attachment_id=2106 for a photo of one of the plywood boxes before the window was installed.
The approach was based on the Denby Dale Passivhaus; see https://www.greenbuildingstore.co.uk/wp-content/uploads/window-plywood-boxes-1024×768.jpg (which is a clearer photo of the principle).
David