
The plot had an electricity supply to the old farmhouse, before that was demolished, so rather than needing a complete new supply it just needed some modifications to the previous electrical installation. The cables connecting to the old farmhouse were removed at the time it was demolished but the rest of the supply infrastructure was left pretty much intact.
There’s a set of 11kV three-phase overhead lines roughly 200m from the plot and the supply comes from those via a pole-mounted transformer and overhead cables. At some point in the past there clearly used to be a three-phase supply (since there’s a support bracket and connections for a three-phase transformer) but more recently it had a single-phase supply and there’s only a single-phase transformer and a pair of overhead cables there now (though there are still three-phase-and-earth cables right next to the transformer).
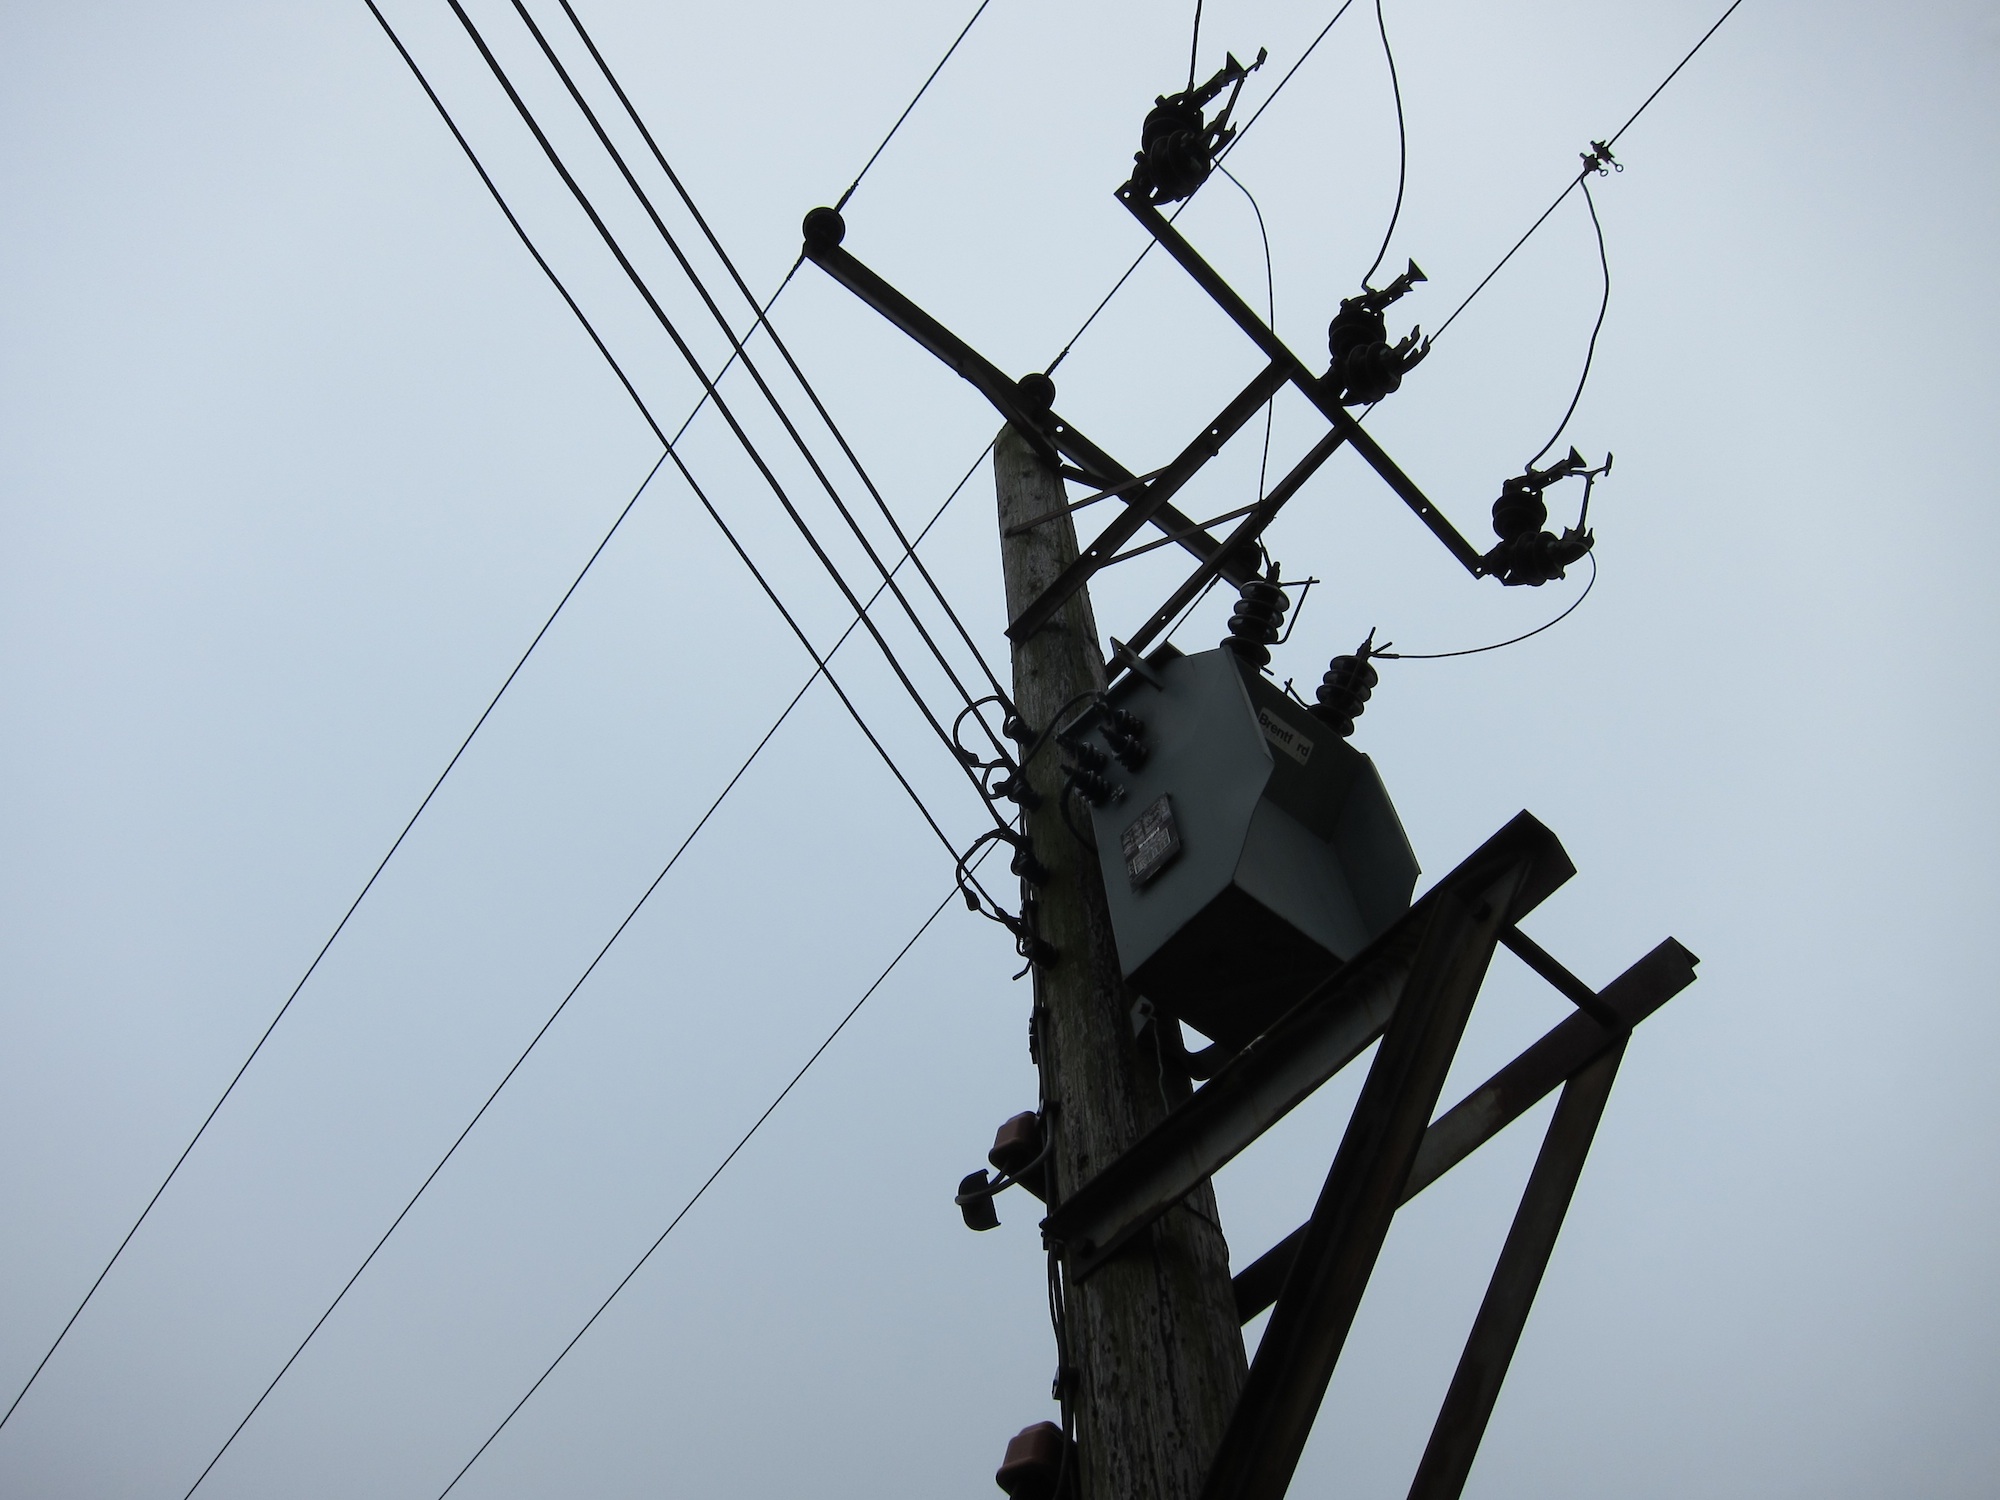
Pole-Mounted Transformer, supplying 230 volt single-phase from 11,000 volt three-phase lines.
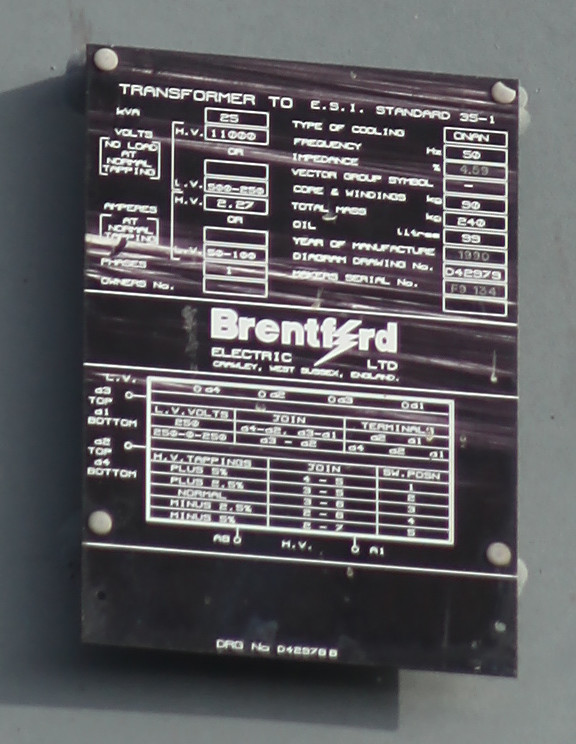
Close-up of the Data Plate on Pole-Mounted Transformer
In order to feed my on-site static caravan and to provide a supply for the builders the existing (80A) single phase supply is more than adequate so I agreed with the electrical network operator to re-enable the previous supply on a temporary basis and to review the long-term requirements once the electrical demands of the new house are better understood. Initially the main focus is the electrical supply to the caravan which is going to be on the northern side of the plot, but long-term the connections will be switched over to feed the house (via the outbuildings) which is on the south side so it makes sense to plan for the long term and to make some compromises for the short term. Obviously it’s important to keep the cables out of the way of the building works, and since the remaining walls of the outbuildings need to be demolished there’s no option to locate the meter on any of the existing buildings so it needs to be located somewhere else – at least for now – and relatively close to the southern boundary which is where the supply comes in. The best option seemed to be to put the meter and other switchgear in a standalone cabinet a few meters from the southern boundary and to run armoured cables underground from there.
You see a lot of roadside cabinets containing electrical equipment next to mobile phone masts and the like. Those tend to be substantial steel enclosures which are robust but very expensive. Glass-Reinforced-Polyester (i.e. fibreglass) cabinets are more affordable and while not quite as robust seem pretty solid, and are available in a range of sizes. To allow some flexibility for housing other electrical equipment it seemed sensible to go for a medium sized model – the IC2 GRP Kiosk from Moorland Composites Limited in Stoke-On-Trent.
Following a site visit by Western Power Distribution, the local DNO, they decided that the wooden “telegraph” pole nearest the house needed replacing before they could re-connect the supply. They suggested installing the new pole a little further to the east, which moved it further out of sight of the house, and made things slightly more convenient for the future connection to the outbuildings, so that was all agreed and they scheduled an installation date of 2013-12-18. They charged me roughly £500 for the re-connection, not including replacing the pole since they treated that as “wear and tear” and hence don’t specifically charge for that.
In preparation for the supply being re-connected I had to prepare a concrete pad for the GRP enclosure to sit on, complete with ducted cable runs up through the concrete for the incoming and outgoing cables (in regulation 38mm electrical cable duct made of black polythene). It was a bit fiddly getting the ducts to stay where I wanted them while the concrete was setting but it all turned out fairly well.
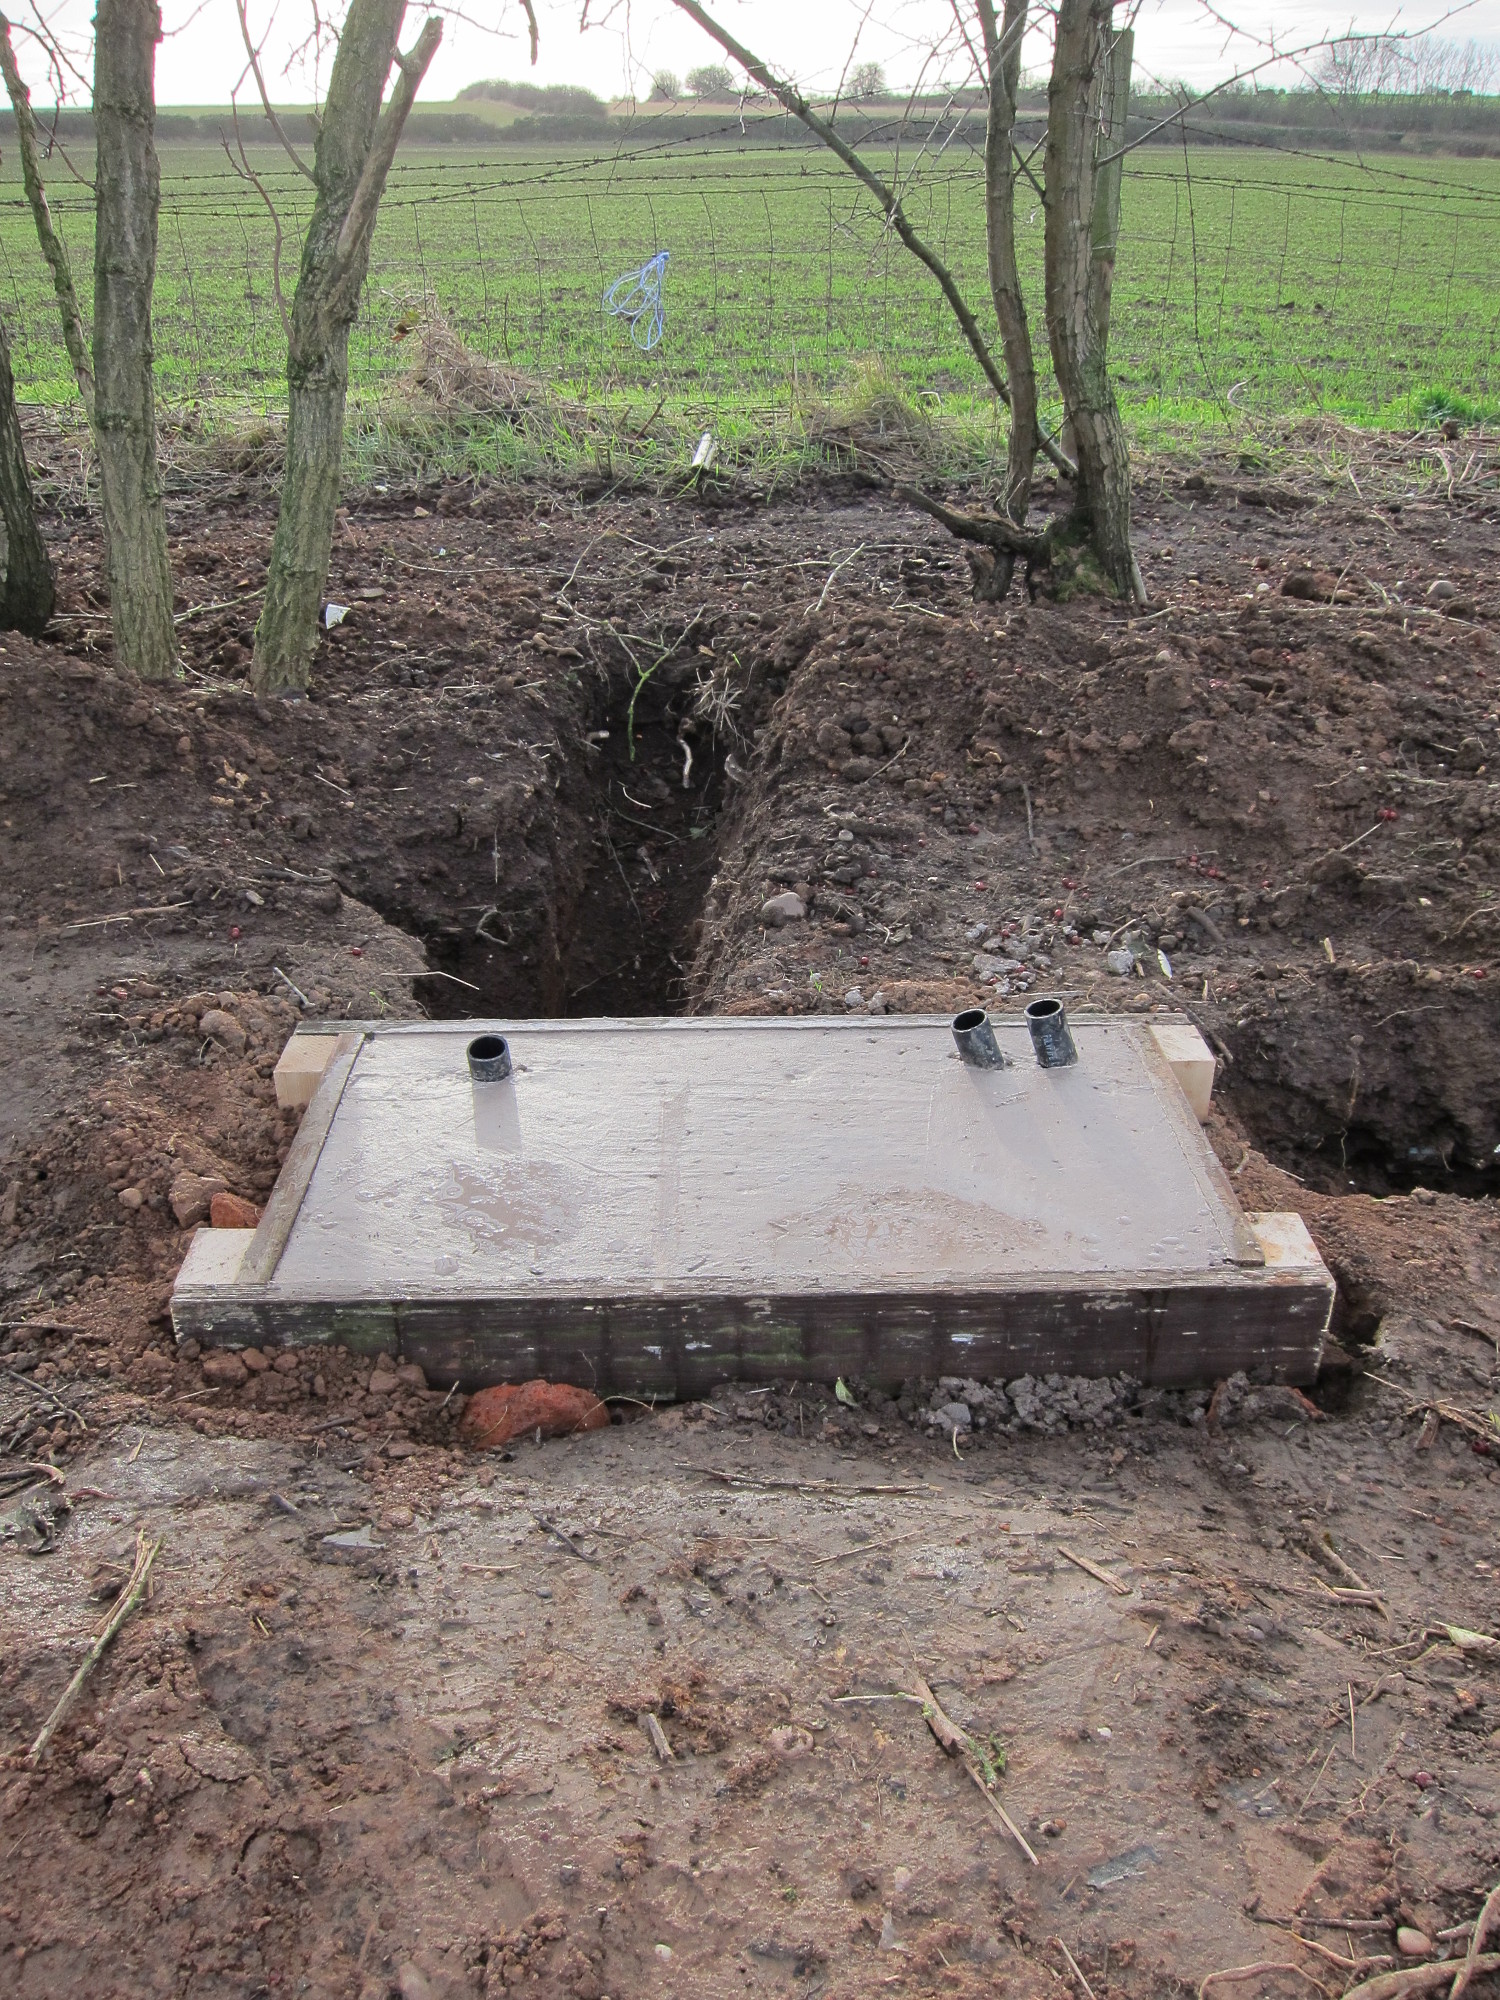
Prepared concrete pad with embedded electrical cable ducts ready for installation of GRP cabinet.
After the concrete had set I installed the green GRP cabinet, complete with “Danger 230 Volts” warning label. It proved surprisingly difficult to drill holes in the concrete for bolts to secure the cabinet, despite investing in a decent cordless hammer drill, but I don’t think it’s going to go anywhere.
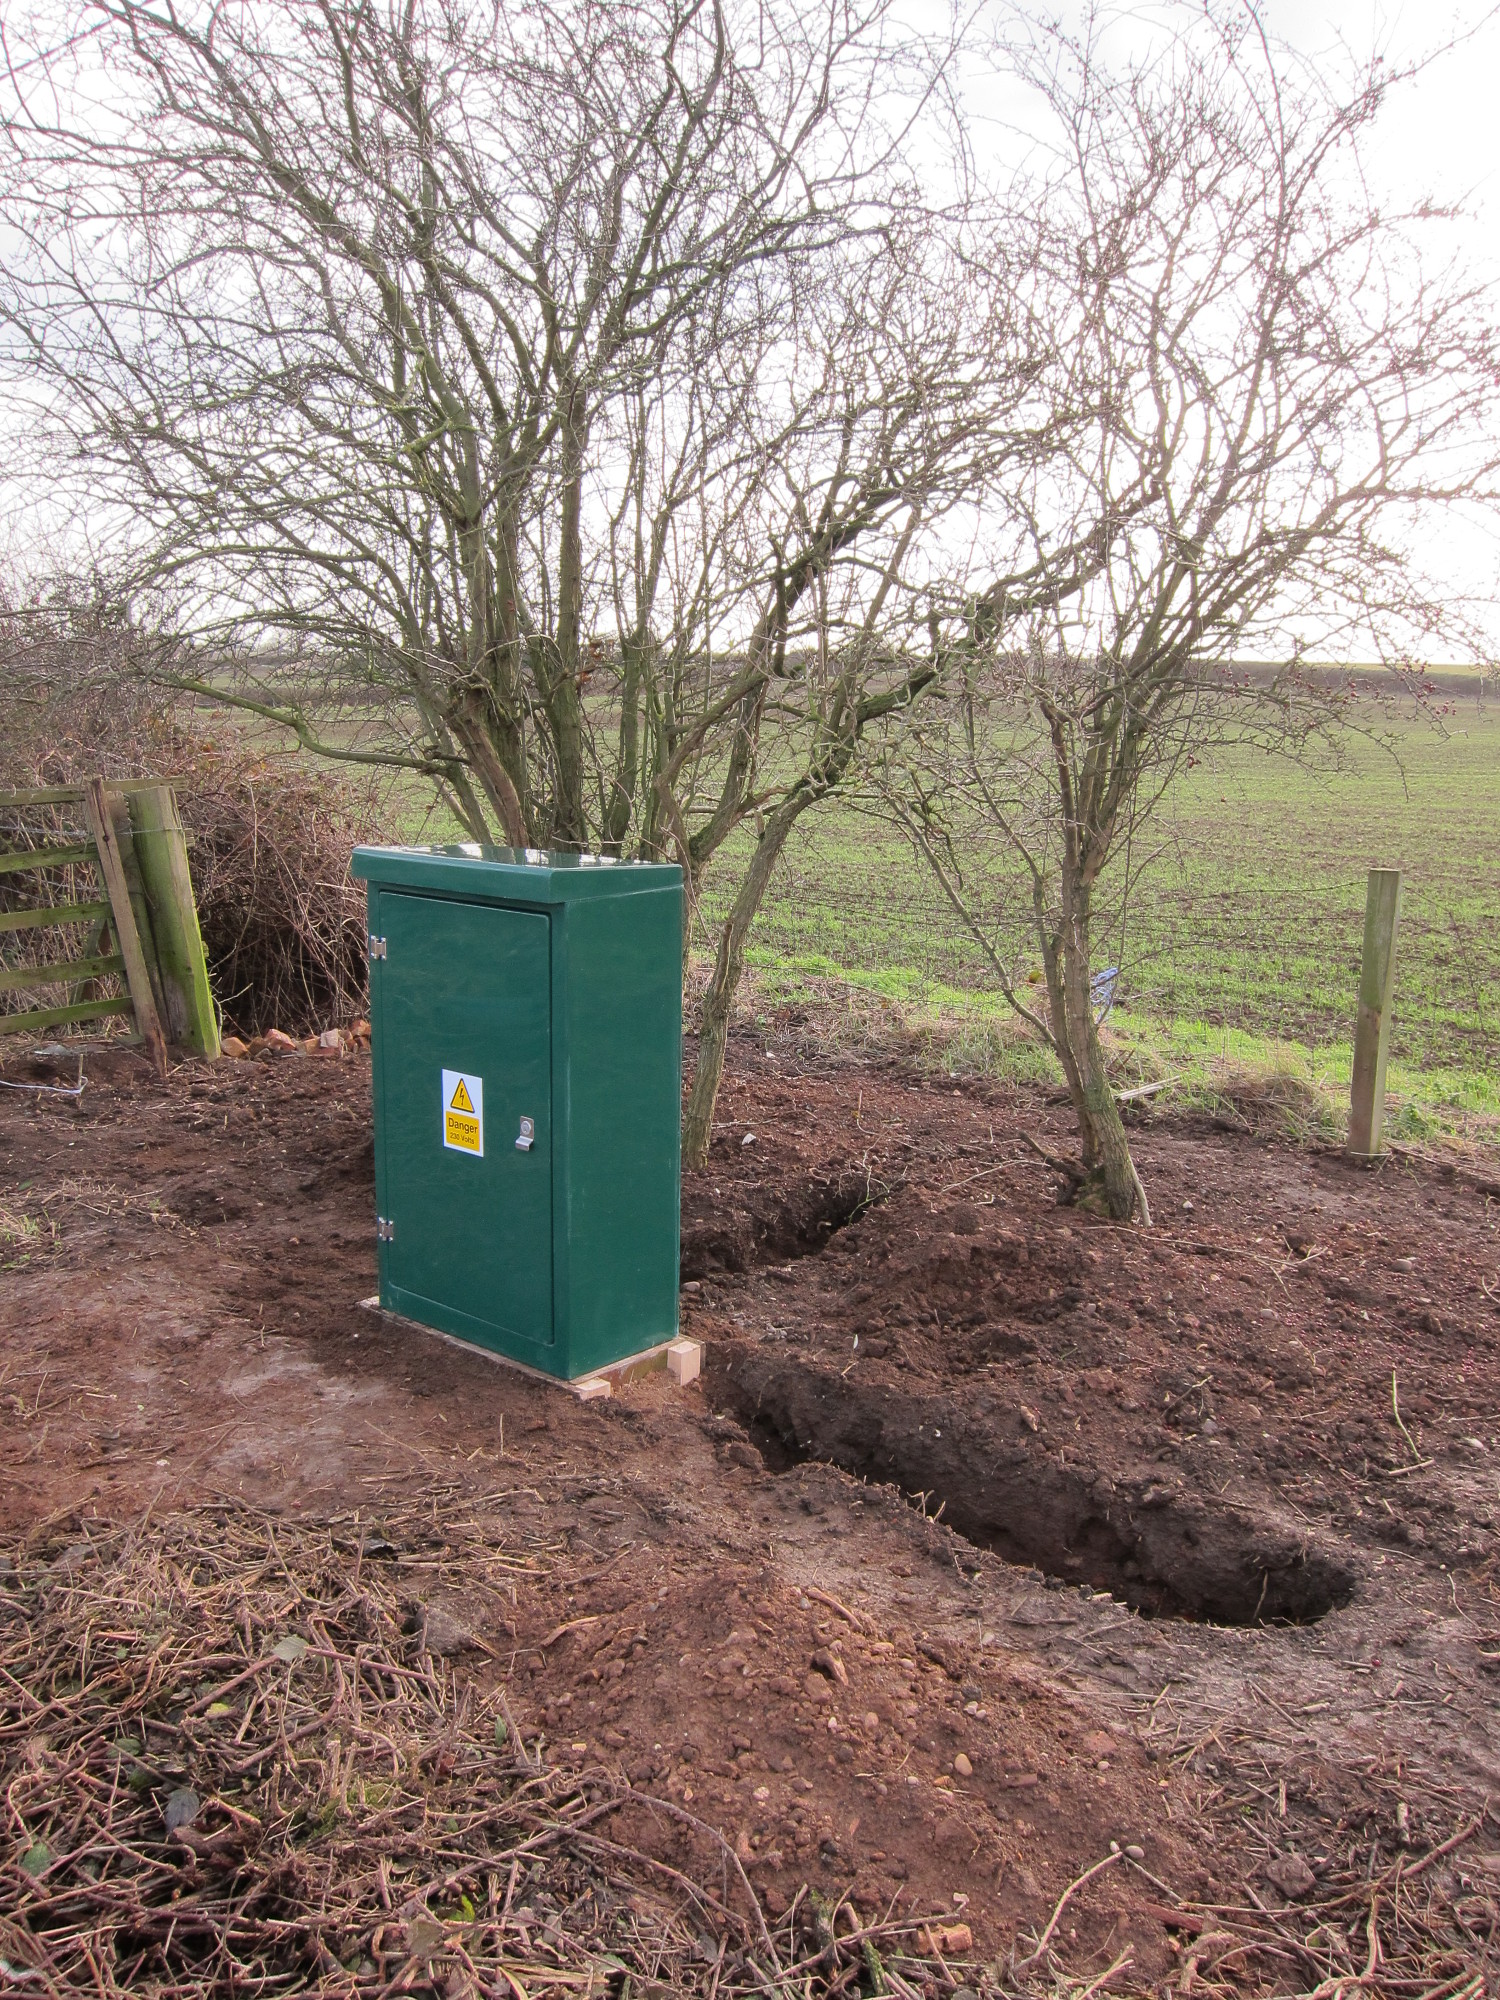
GRP enclosure mounted on concrete pad with trenches for incoming and outgoing cables.
On connection day the Western Power Distribution team turned up with some pretty impressive kit to auger a nice deep hole for the new pole and to lift it into position.

Western Power Distribution team using crane-mounted auger to prepare hole for new pole.
You can’t tell from the photos but it was quite a windy day, and rather cold – and no doubt feeling all the more windy when you’re working at the top of a pole.
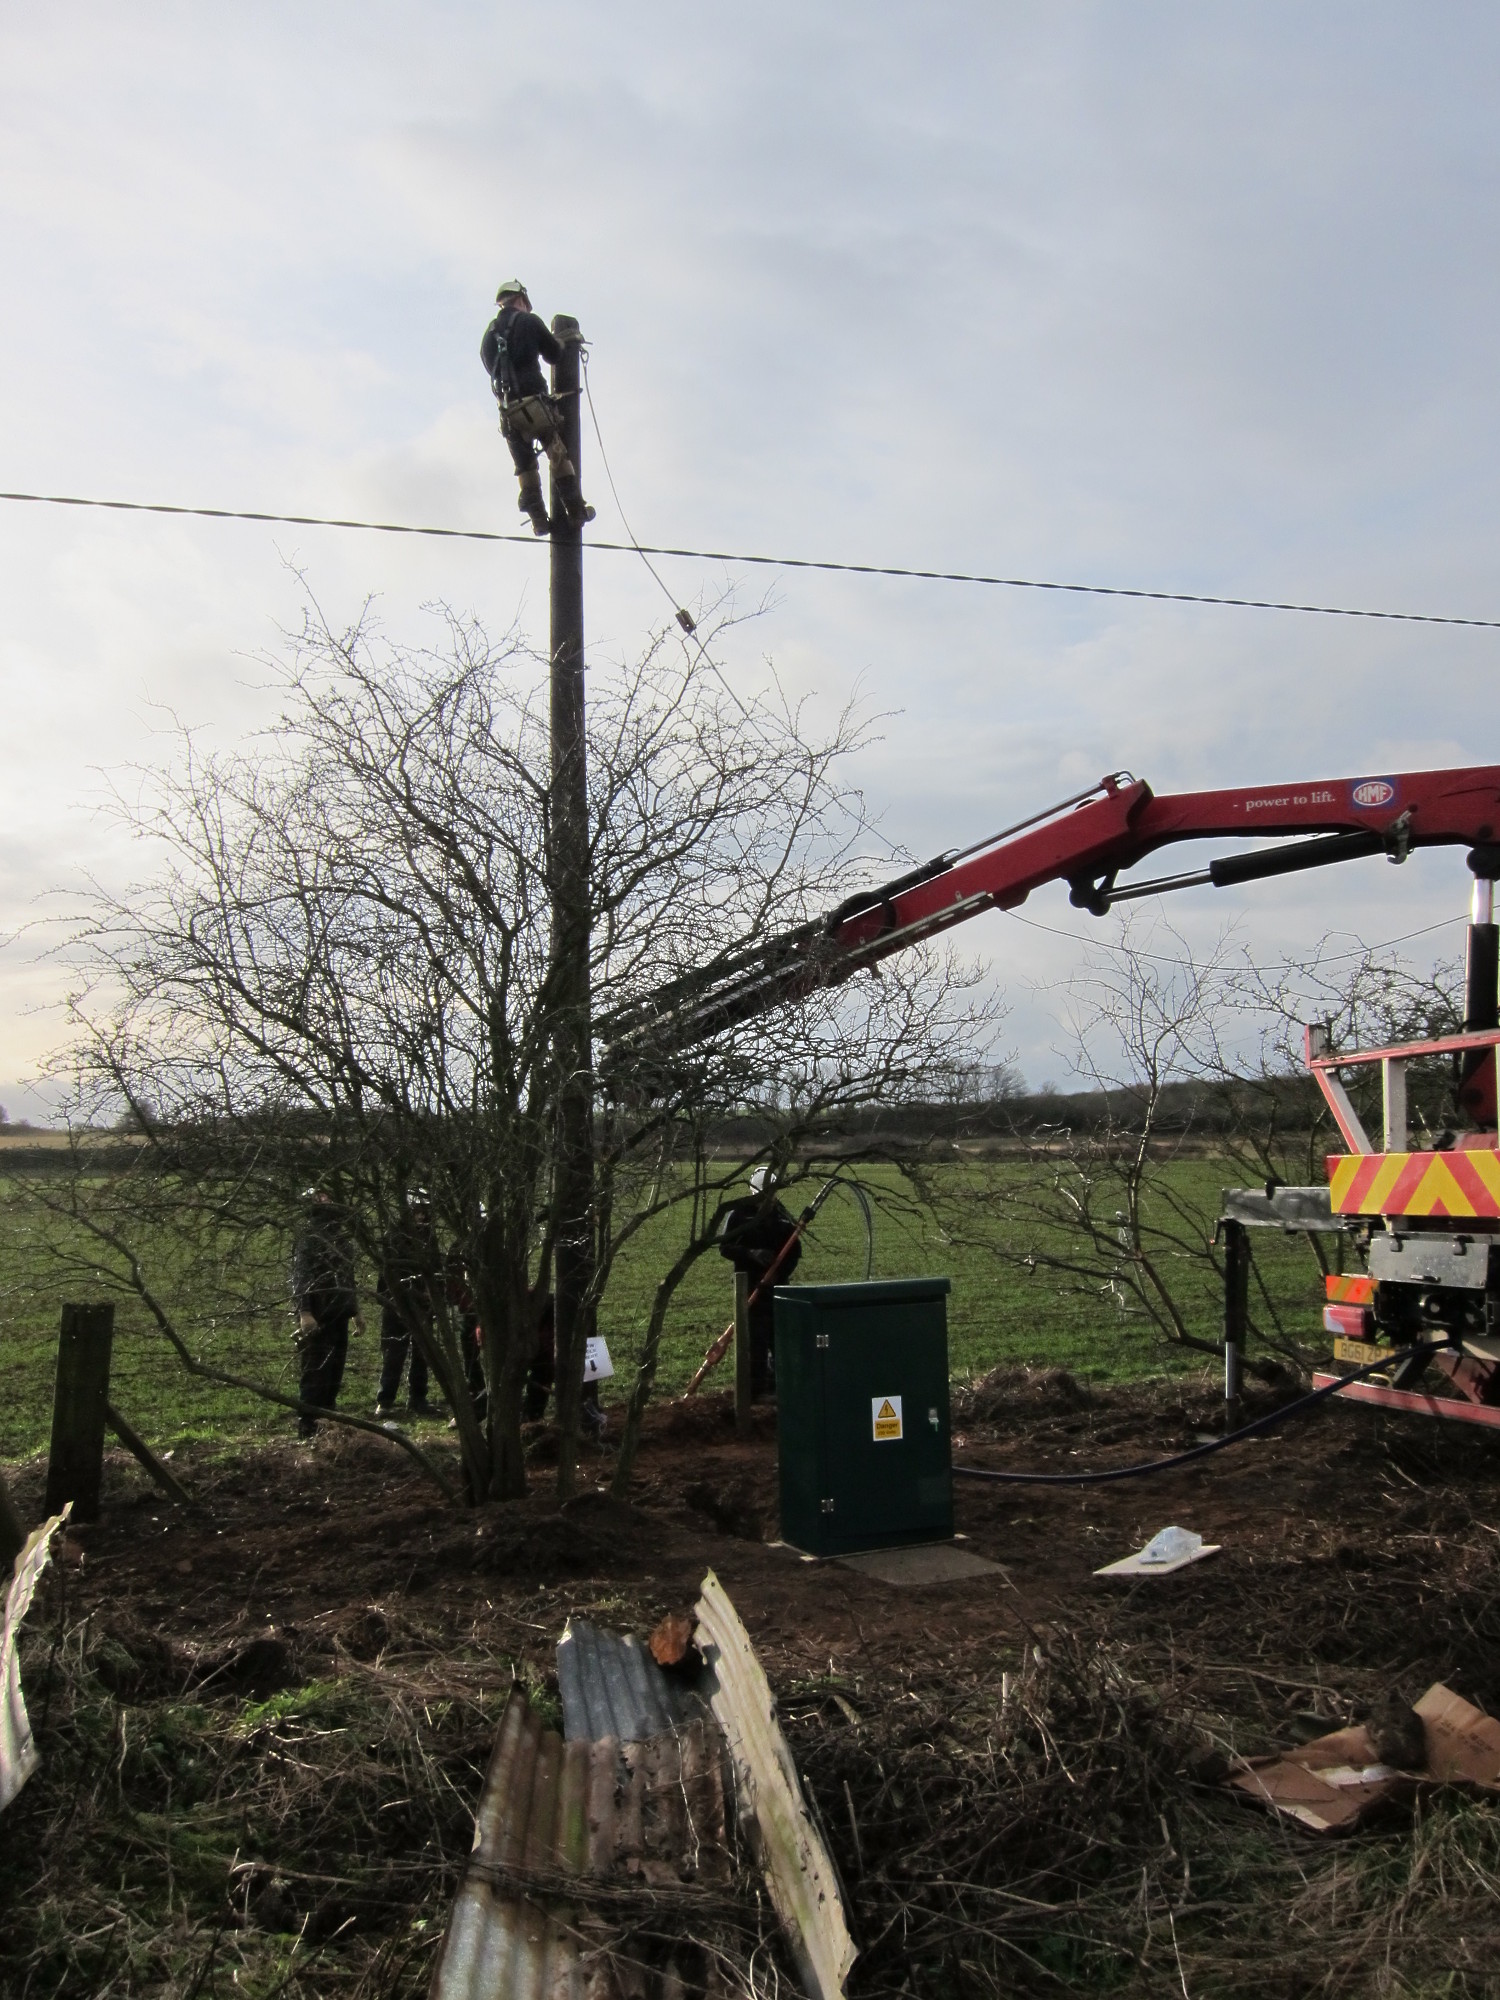
Western Power Distribution team preparing to terminate incoming electricity supply at new pole.
The supply cable runs down the new pole and underground for about 3 metres before entering the bottom of the cabinet, so it all looks rather neat. Once I’d cleared all the brambles away there wasn’t much of the old hawthorn hedge left (and I had to coppice one of the remaining hawthorns to provide access) but once the hedge gets replanted it will start to look a bit more natural again.

Installed GRP enclosure on concrete pad connected to new pole with incoming overhead single-phase supply.
The DNO is only responsible for installing their “cutout” (fuse) so this is how the Western Power Distribution team left the cabinet.
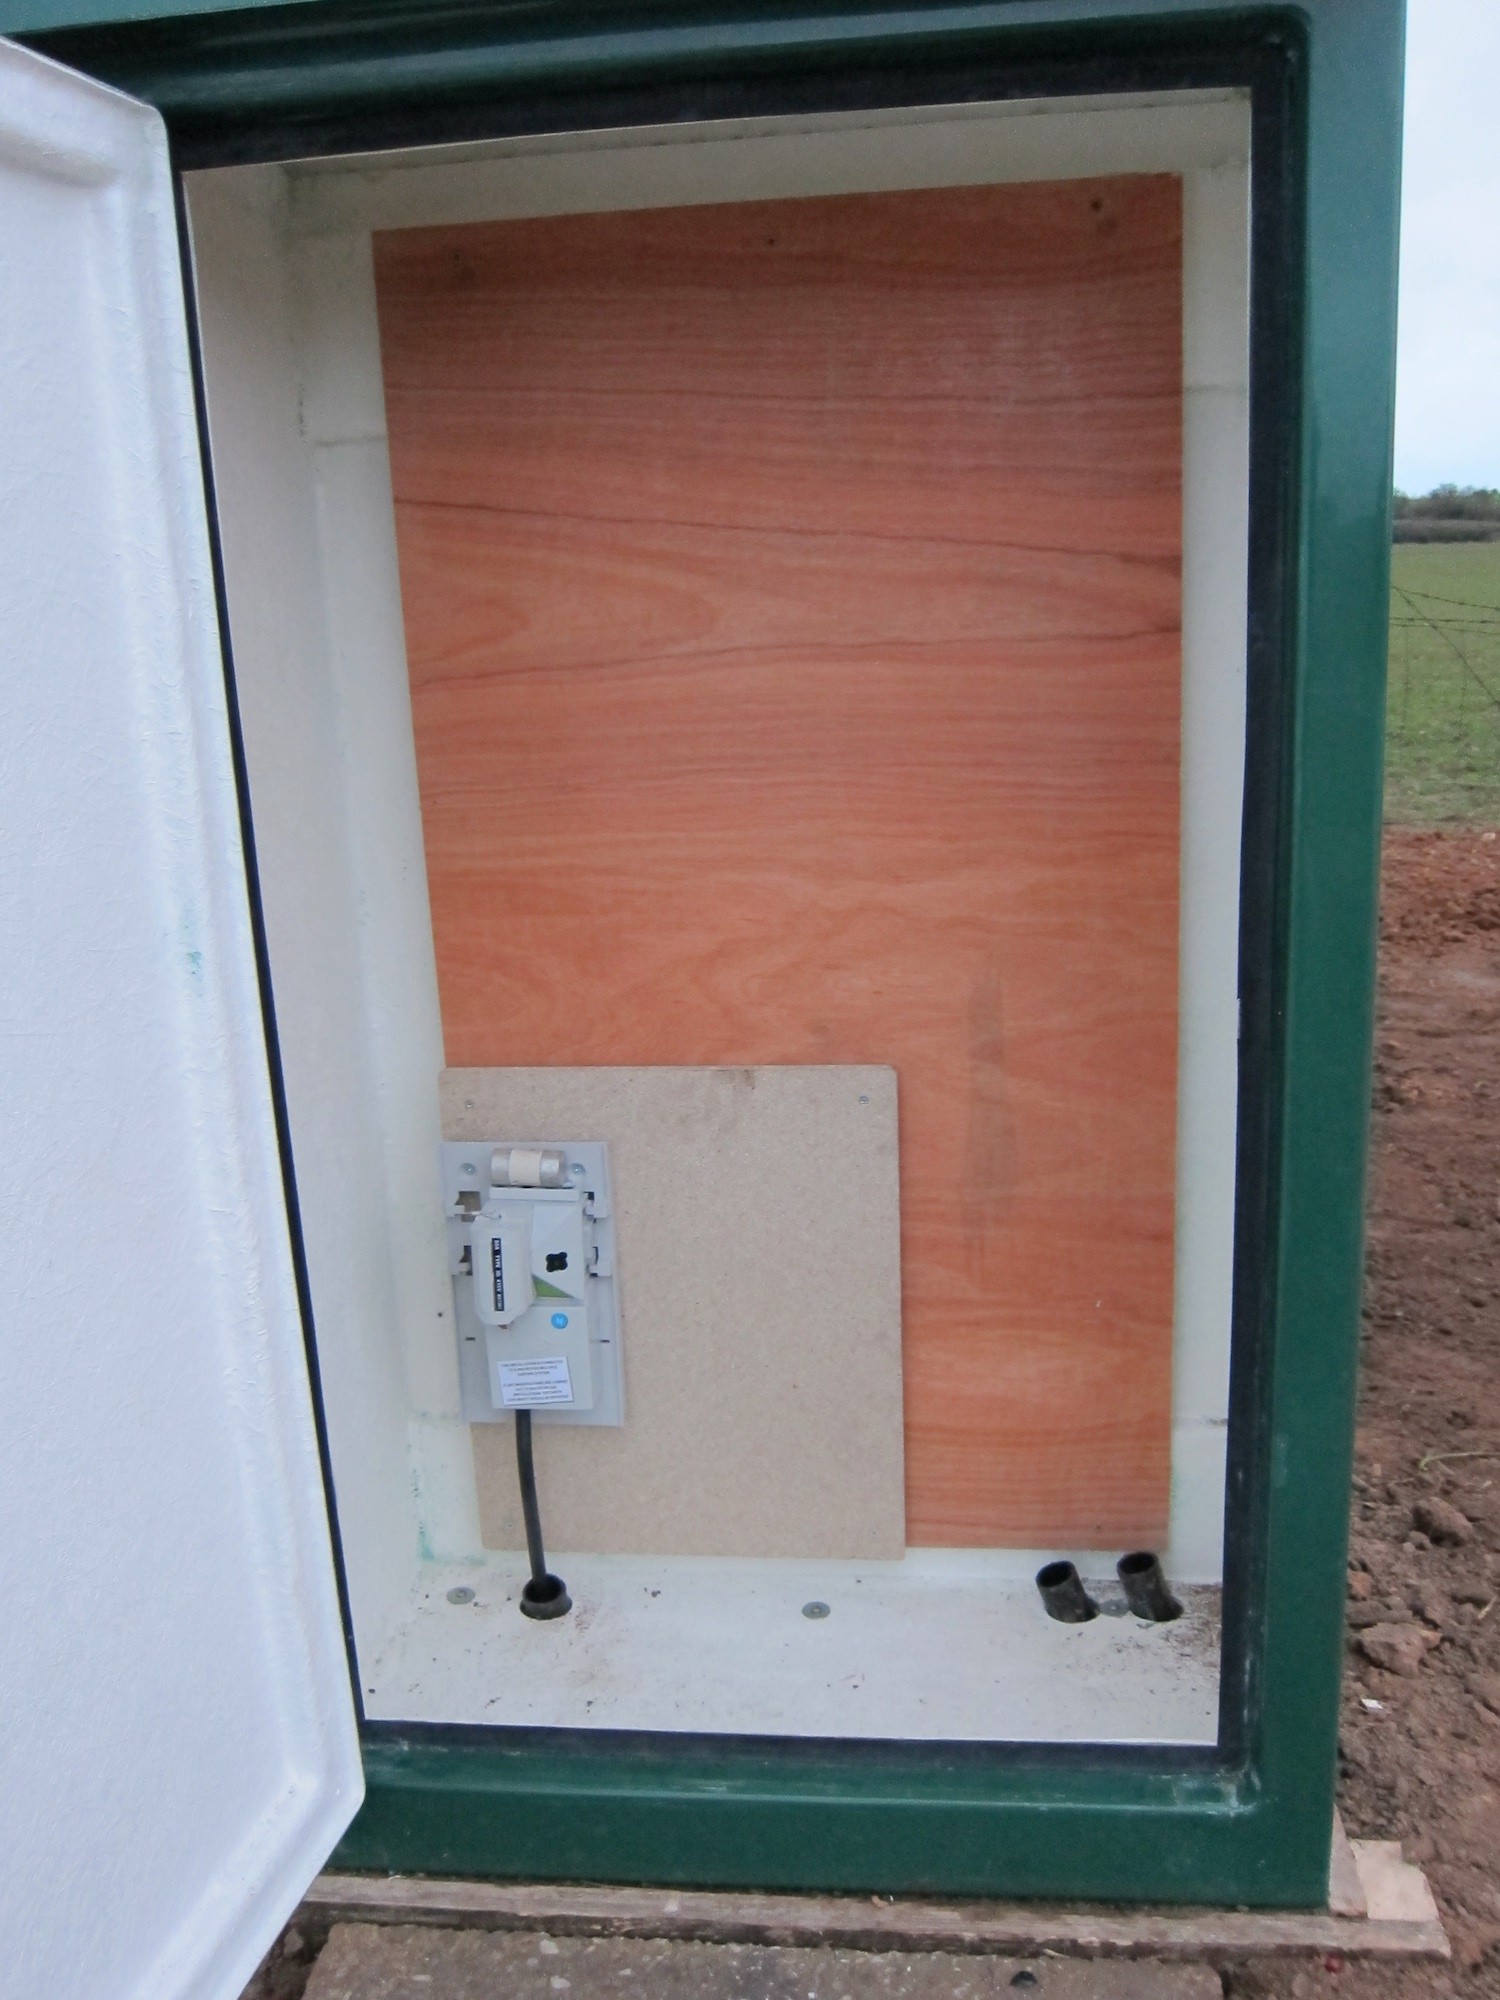
GRP cabinet with Western Power Distribution cutout installed, ready for meter.
I had already arranged for my electricity supplier to install a meter on 2013-12-20, and that went ahead as planned. Now everything is ready for me to have my own electrician install some sort of consumer unit to connect to the cables feeding out to the caravan and builders’ site hut.
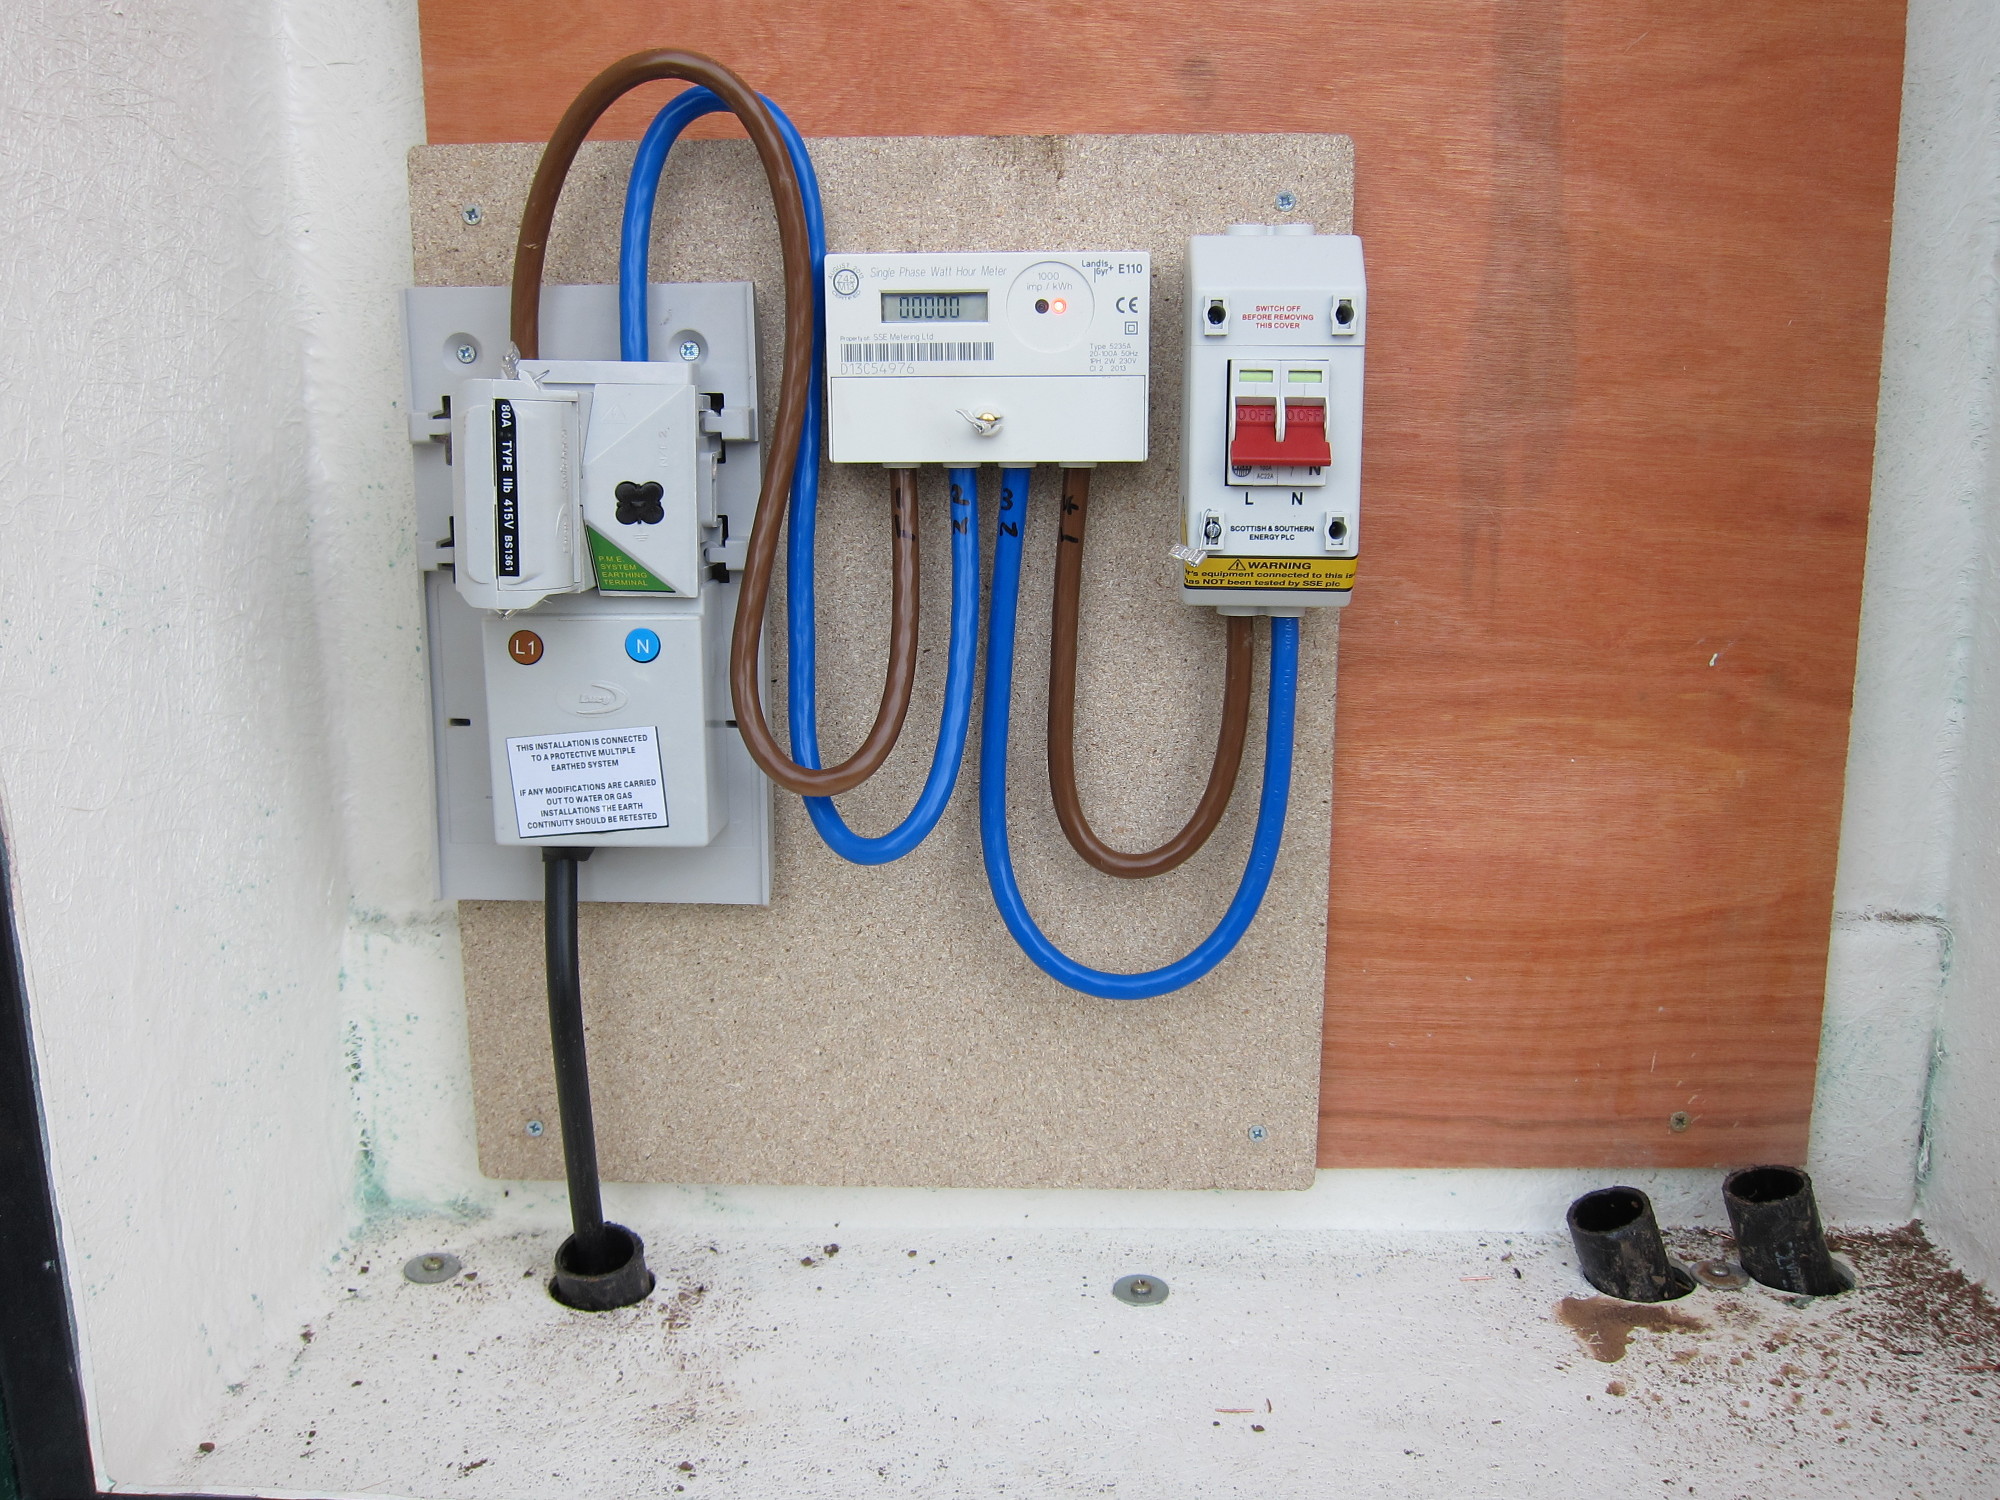
Newly-installed cutout (Western Power Distribution, left), meter and isolator (Southern Electric, centre and right) in GRP enclosure.
![]() Electricity Supply (Re-)Installation by Marsh Flatts Farm Self Build Diary is licensed under a Creative Commons Attribution-ShareAlike 4.0 International License.
Electricity Supply (Re-)Installation by Marsh Flatts Farm Self Build Diary is licensed under a Creative Commons Attribution-ShareAlike 4.0 International License.
Hi ,
Just a quick message to ask you to check the Southern Electrical part of your electrical installation. Your picture of the supply coming out of your cut out fuse to the meter looks fine, however your supply to your isolator is a little concerning. If you look closely you will see that they have back fed the isolating switch by feeding the switch from the bottom end and not the top. Generally, switches are fed in at the top with the load connected (i.e. your consumer unit) fed from the bottom.
Also you will note that SSE have placed a disclaimer label on the bottom of the switch for loads connected to it.
I hope this was of help to you.
Kind Regards
Warren Greaves – Designer / Inspector / Electrician