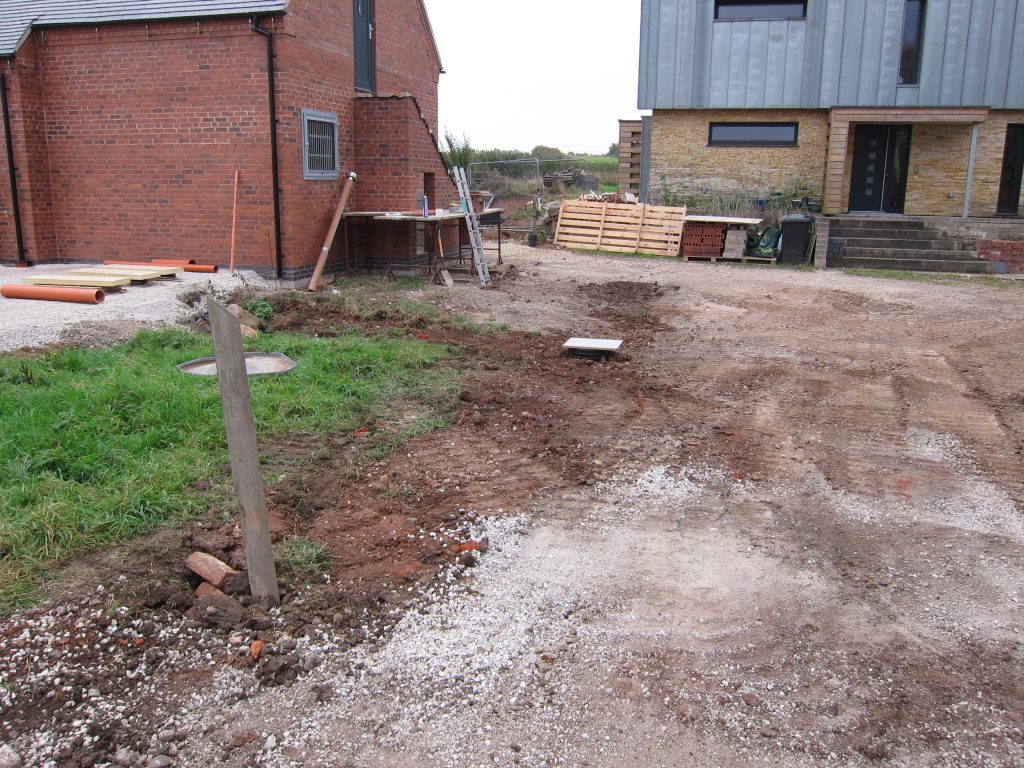
Outbuildings: Week 31, Day 3

Outbuildings: Week 31, Day 3

Filling the gap between the Garage floor slab and the four threshold drains with concrete (which should dry to better-match the colour of the floor slab). As previously noted, the Garage Doors (roller shutters) will sit behind the brickwork openings.

Fresh concrete fill between the garage floor slab and the Aco threshold drain

In the Courtyard, more progress with making all the connections required around and to the West of the rainwater tank:

  • The blue ‘pipe’ in the photo below is a duct that will hold pipes and cables for the rainwater tank, bringing those to the control unit inside the ‘stable’
    • One flexible ‘pressure’ pipe for rainwater under pressure from the submersible in-tank pump
    • One mains supply cable for the pump
    • One flexible pipe to carry mains top-water into the tank in the event of the level falling below a threshold
    • One mains cable for the water level switch, mounted on the pump, to control the solenoid valve for the mains top-up – switching it on when the water level in the tank is too low then off again when it has risen (slightly)
  • The short pale grey ‘pipe’ is a duct which will be replaced with a much longer one and will contain data cables connecting the House to the Outbuildings
  • There need to be so many brown drain pipes – at different levels – to separate:
    • The fresh rainwater from the downpipe at the far left, heading for the inlet to the rainwater tank
    • The ground-level and land-drain drainage which needs to ‘bypass’ the rainwater tank (connected at the ‘covered’ inspection chamber nearest the camera)
    • The overflow from the rainwater tank, which needs a dedicated connection to a non-return valve (accessible via the ‘open’ inspection chamber)

The 32mm incoming mains and harvested-rainwater pipes still need to be installed, between the two ducts.

Fortunately, downstream of the non-return valve, all the drainage pipework can be brought together in a single 160mm pipe to exit the Courtyard, so from there on things get much simpler.

Maze of pipes and ducts to the West of the rainwater tank

Also, completion of the loft insulation over the Workshop and Utility Room, in readiness for the ceiling being skimmed with plaster in the coming days.

Outbuildings: Week 31, Day 2

Outbuildings: Week 31, Day 2

The first five of the reconstituted stone steps delivered yesterday have been installed. (A further three slabs were delivered but those are destined for the top landing and can’t be installed yet.) The stone looks a bit yellow (more so than the Bath stone sample provided) but it should tone down soon enough. For some reason the slabs had been made too long – perhaps with some assumption about them being built-in to the wall (rather than supported on an additional skin of blockwork) – so needed cutting down on-site.

The first five of the stone steps installed for the External Staircase

The stone foundation for the parking area by the Garages was levelled and compacted. It has a shallow fall to the North (the left of the photo) to help with water run-off into the grass – although it will use permeable block paving so most of the water will percolate through the paving and into the crushed stone base layer – then on into the ground beneath.

Crushed stone foundation for the block paved parking area North of the Garage Doors

Also some more progress in the Courtyard, bringing some of the land drains together into an inspection chamber and planning the route to the next inspection chamber, which needs to avoid a foul drainage pipe and the water mains.

A little more plumbing too, mounting the four outside taps.