Week 7, Day 4

Week 7, Day 4:

  • More progress with the beam-and-block floor, adding blocks to fill the gaps between the beams, cutting as necessary
  • Installation of the 3 courses of blue engineering bricks immediately below the damp-proof-course on the outer skin of the cavity wall
    • Except for in the areas beneath the sliding glass doors, since those need to be fixed to wooden frames which in turn need to be fixed to the blockwork below and the blocks provide a much better fixing than the engineering bricks
  • Completion of the below-floor drainage
Week 7, Day 4

Week 7, Day 4

Three courses of "blue" engineering bricks immediately below DPC on the outer cavity wall

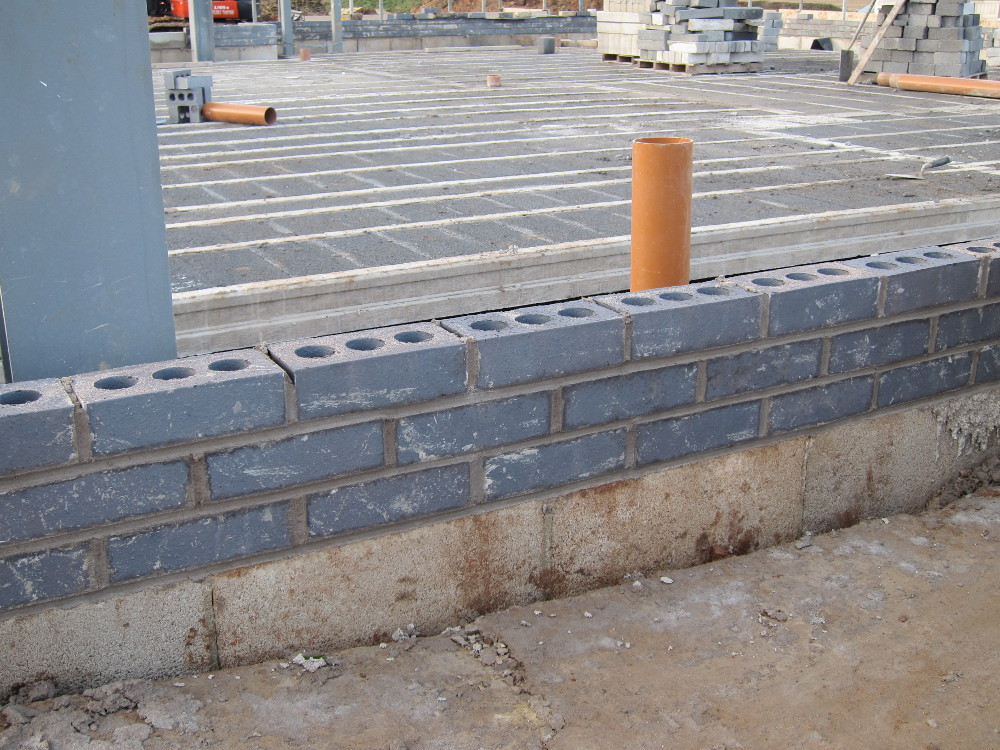
Three courses of blue engineering bricks immediately below DPC

Week 7, Day 3

Week 7, Day 3:

  • Further progress on the beam-and-block floor, though now most of the “easy” blocks are in and it’s a question of taking time to complete the more fiddly bits
  • As implied by the brown pipes laying on the beams, work has started on installing the pipes that will connect the four internal drains to the outside, running under the floor beams
Week 7, Day 3

Week 7, Day 3

One advantage of the beam-and-block floor construction method is that it provides a solid working platform but it’s still possible to gain access to the under floor void throughout the majority of the build, by removing some of the blocks. The electricity cable and water mains connection will need to run through the underfloor void but they can be installed later.

A few weeks before completion, once most of the other work has been done, a layer of insulation will be laid on top of the beam-and-block and covered with a layer of concrete. In some areas this concrete will be polished to form the final floor finish; in others it will be left a little thinner and covered with engineered wood flooring.